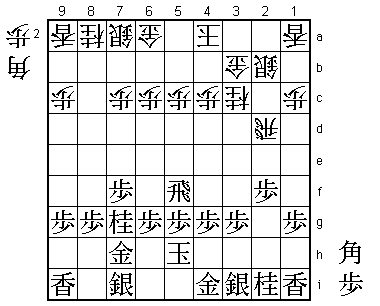
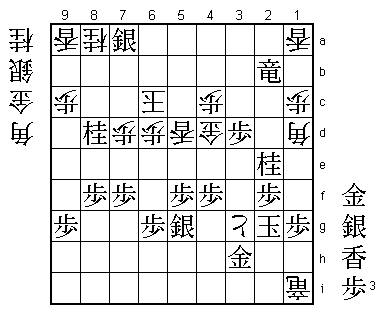
75th Kisei Match Game 3
[Black "Sato Yasumitsu, Kisei"]
[White "Moriuchi Toshiyuki, Challenger"]
[Event "75th Kisei-sen, Game 3"]
[Date "July 7th 2004"]
1.P7g-7f 00:00:00 00:00:00
2.P3c-3d 00:00:00 00:01:00
3.P2g-2f 00:01:00 00:01:00
4.P8c-8d 00:01:00 00:01:00
5.P2f-2e 00:03:00 00:01:00
6.P8d-8e 00:03:00 00:01:00
7.G6i-7h 00:03:00 00:01:00
8.G4a-3b 00:03:00 00:01:00
9.P2e-2d 00:03:00 00:01:00
10.P2cx2d 00:03:00 00:01:00
11.R2hx2d 00:03:00 00:01:00
12.P8e-8f 00:03:00 00:01:00
13.P8gx8f 00:03:00 00:01:00
14.R8bx8f 00:03:00 00:01:00
15.R2dx3d 00:03:00 00:01:00
16.B2b-3c 00:03:00 00:01:00
17.R3d-3f 00:05:00 00:01:00
18.S3a-2b 00:05:00 00:01:00
19.K5i-5h 00:08:00 00:01:00
20.K5a-4a 00:08:00 00:04:00
21.P*8g 00:09:00 00:04:00
22.R8f-8e 00:09:00 00:04:00
23.B8hx3c+ 00:17:00 00:04:00
24.N2ax3c 00:17:00 00:04:00
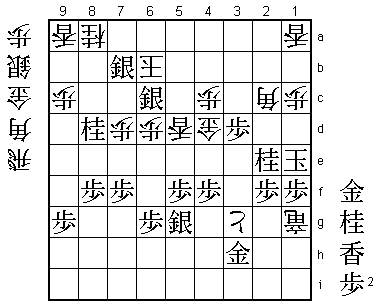
25.N8i-7g 00:17:00 00:04:00
26.R8e-2e 00:17:00 00:04:00
27.P*2f 00:17:00 00:04:00
28.R2e-2d 00:17:00 00:04:00
29.R3f-5f 00:18:00 00:04:00
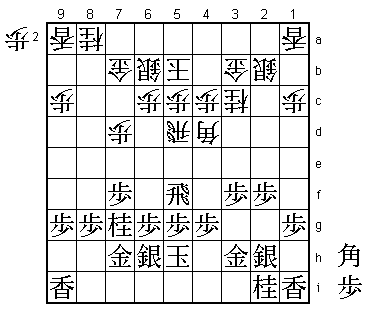
One of the latest strategies against the R8e Yokofudori opening. It was

first played by Nakahara in March 2003, but it became very well-known

after the 2nd game of the Oza match in September 2003, when Watanabe used

it to beat Habu in only 69 moves. Since then it has been played in 12

games with black and white each winning half. The point of this strategy

is that black is a pawn up for which white seeks compensation in having

more freedom to move the rook. Nakahara is still the main proponent of

this strategy, playing it four times (winning three). Watanabe, who is

known for studying the R8e Yokofudori very deeply, has also played white

against 29.R5f twice, winning one and losing one.


30.G6a-6b    00:18:00  00:12:00

31.G4i-3h    00:18:00  00:12:00

32.R2d-5d    00:18:00  00:12:00

33.R5f-6f    00:19:00  00:12:00

34.K4a-5b    00:19:00  00:15:00

35.S7i-6h    00:25:00  00:15:00

36.G6b-7b    00:25:00  00:29:00

37.S3i-2h    01:12:00  00:29:00

38.S7a-6b    01:12:00  00:36:00

39.P3g-3f    01:16:00  00:36:00

40.B*4d      01:16:00  00:58:00

41.R6f-5f    01:44:00  00:58:00

42.P7c-7d    01:44:00  01:52:00
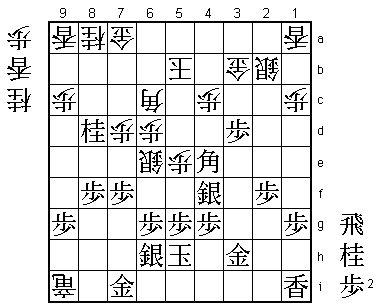
In the press room, 42.P8f was analyzed, which seemed to give white the

upper hand. Moriuchi did not play it because he did not like 43.Px8f

Rx5f Px5f R*8i B*8h P*8g Gx8g Rx2i+ G3i. Sato planned to answer 42.P8f

with 43.B*9h!. Both players looked at different things, but both had

looked deeper than the professionals on the sidelines.


43.B*4f      03:03:00  01:52:00

44.P6c-6d    03:03:00  02:05:00

45.R5fx5d    03:04:00  02:05:00

46.P5cx5d    03:04:00  02:05:00

47.P3f-3e    03:05:00  02:05:00

48.B4d-5e?!  03:05:00  02:36:00

This is turning into a very close game where it is hard to find any
mistakes. If there is a dubious move, this is the one. 48.P5e, locking
out the black bishop seems to be good for white because black has no
good squares to drop the rook. After the game, Moriuchi admitted that
P5e was the most natural move and that B5e was an overplay.
49.B4fx5e 03:18:00 02:36:00
50.P5dx5e 03:18:00 02:36:00
51.B*2g 03:20:00 02:36:00
52.B*6c 03:20:00 02:47:00
53.B2gx6c+ 03:23:00 02:47:00
54.S6bx6c 03:23:00 02:47:00
55.B*2g 03:23:00 02:47:00
56.B*5d 03:23:00 02:56:00
57.B2gx5d 03:24:00 02:56:00
58.S6cx5d 03:24:00 02:56:00
59.B*2g 03:25:00 02:56:00
60.B*6c 03:25:00 03:00:00
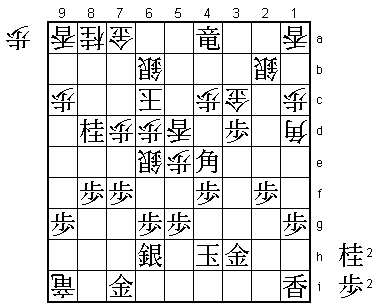
By dropping the bishop on 2g multiple times, Sato has managed to draw
out the defending silver on 6b to 5d. This seems good for black, but
Sato was a bit disappointed with the result. The game is still very
close.
61.N2i-3g 03:27:00 03:00:00
62.P*8f 03:27:00 03:10:00
63.P8gx8f 03:30:00 03:10:00
64.R*8i 03:30:00 03:11:00
65.G7h-7i 03:33:00 03:11:00
66.R8ix9i+ 03:33:00 03:11:00
67.P3e-3d 03:36:00 03:11:00
68.N3c-4e 03:36:00 03:13:00
69.N7g-6e 03:39:00 03:13:00
70.N4ex3g+ 03:39:00 03:27:00
71.S2hx3g 03:39:00 03:27:00
72.N*4e 03:39:00 03:27:00
73.S3g-4f 03:47:00 03:27:00
74.S5dx6e 03:47:00 03:35:00
75.N*8d 03:48:00 03:35:00
76.G7b-7a 03:48:00 03:39:00
77.B2gx4e 03:49:00 03:39:00
Looks good for black, but white has a nice counterpunch...


78.N*5d!     03:49:00  03:39:00


Which is in turn nicely countered...


79.K5h-4h!   03:54:00  03:39:00


A well-timed early escape. This is one of those games where the

player who just moved seems to have the upper hand after each move.


80.N5dx4f    03:54:00  03:50:00

81.B4ex6c+   03:54:00  03:50:00

82.K5bx6c    03:54:00  03:50:00

83.P4gx4f    03:54:00  03:50:00

84.B*1d      03:54:00  03:50:00

85.R*5a      03:54:00  03:50:00

86.S*6b      03:54:00  03:51:00

87.B*4e      03:56:00  03:51:00

88.L*5d      03:56:00  03:55:00

89.R5a-4a+   03:56:00  03:55:00

90.G3b-3c    03:56:00  03:55:00
With both rooks promoted, it seems that the game is drawing to an

end. However, after this move, everyone in the press room started

to hold their breath. 91.+R4b G3b +R4a G3c would be another

sennichite!


91.+R4a-4b   03:56:00  03:55:00

92.G3c-4d    03:56:00  03:55:00


Moriuchi wants nothing of it. Actually, Sato also did not want the

sennichite. If play continued 92.G3b +R4a G3c, he had planned to

take his chances with Px3c+ Bx4a +Px4c K7c +P4d which is too close

to call.


93.B4e-2g    03:56:00  03:55:00

94.P5e-5f    03:56:00  03:55:00

95.P5gx5f    03:56:00  03:55:00

96.K6c-7c    03:56:00  03:55:00

97.+R4bx2b   03:57:00  03:55:00

98.S6ex5f    03:57:00  03:55:00

99.N*2e      03:57:00  03:55:00

100.S5f-5g=  03:57:00  03:55:00

101.S6hx5g   03:57:00  03:55:00

102.+R9ix7i  03:57:00  03:57:00

103.P*5f     03:58:00  03:57:00

104.P*3g     03:58:00  03:57:00

105.K4hx3g   03:58:00  03:57:00

106.+R7ix1i  03:58:00  03:57:00

107.N*3f     03:58:00  03:57:00

108.L*3e     03:58:00  03:57:00

109.S*7b     03:59:00  03:57:00

110.L3ex3f   03:59:00  03:58:00

111.B2gx3f   03:59:00  03:58:00

112.P*3e     03:59:00  03:58:00

113.S7bx7a=  03:59:00  03:58:00

114.P3ex3f   03:59:00  03:58:00

115.K3g-2g   03:59:00  03:58:00

116.S6bx7a?  03:59:00  03:59:00


It took more than one and a half hour to reach the conclusion that

116.P3g+ first would have been better. The reason for this is that

a silver on 6b might play a role in stopping black from entering!

It is a bit harsh on Moriuchi to blame him for overlooking (in

byoyomi) the brilliant move Sato has.


117.S*8b     03:59:00  03:59:00

118.K7c-6c   03:59:00  03:59:00

119.S8bx7a=  03:59:00  03:59:00

120.P3f-3g+  03:59:00  03:59:00
121.K2g-1f!  03:59:00  03:59:00


This looks extremely dangerous. 121.K1f, which was at first thought to

be a blunder by Sato, actually wins the game. "Even in my wildest dreams

I could not foresee the king escaping" (Moriuchi). The bishop on 1d, which

seems to work fine in attack, suddenly becomes a piece that blocks all of the white

attacking options.


122.S*1e     03:59:00  03:59:00

123.K1fx1e   03:59:00  03:59:00

124.N*2c     03:59:00  03:59:00

125.+R2bx2c  03:59:00  03:59:00

126.+R1ix1g  03:59:00  03:59:00

127.P*1f     03:59:00  03:59:00

128.B1dx2c   03:59:00  03:59:00

129.S*7b     03:59:00  03:59:00

130.K6c-5b   03:59:00  03:59:00

131.S7a-6b+  03:59:00  03:59:00

132.K5bx6b   03:59:00  03:59:00

133.S*6c     03:59:00  03:59:00

Resigns      03:59:00  03:59:00
Moriuchi plays on until even a beginner can find the mate, probably

to compose himself after suffering a shocking 3-0 defeat. The first

two games were all Sato, but this third game was more decided by luck

than by anything else. Moriuchi was the favorite going into this match,

taking the Ryu-O, Osho and Meijin titles from Habu, but in Sato he met

a determined opponent. Sato's third consecutive Kisei title is a great

wedding present for his fiancee.