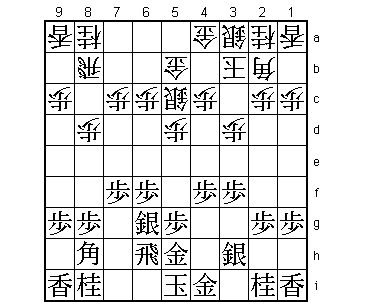
55th Oza Match Game 3
[Black "Kubo Toshiaki, Challenger"]
[White "Habu Yoshiharu, Oza"]
[Event "55th Oza-sen, Game 3"]
[Date "October 3rd 2007"]
1.P7g-7f 00:00:00 00:00:00
2.P3c-3d 00:00:00 00:01:00
3.P6g-6f 00:03:00 00:01:00
4.P8c-8d 00:03:00 00:04:00
5.R2h-6h 00:03:00 00:04:00
6.S7a-6b 00:03:00 00:05:00
7.S7i-7h 00:04:00 00:05:00
8.K5a-4b 00:04:00 00:05:00
9.S7h-6g 00:05:00 00:05:00
10.K4b-3b 00:05:00 00:05:00
11.S3i-3h 00:05:00 00:05:00
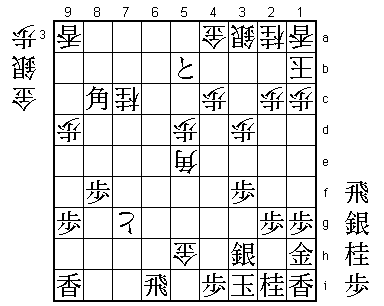
12.P5c-5d 00:05:00 00:22:00
13.P4g-4f 00:05:00 00:22:00
14.G6a-5b 00:05:00 00:24:00
15.G6i-5h 00:05:00 00:24:00
16.S6b-5c 00:05:00 00:37:00
17.P3g-3f 00:05:00 00:37:00
After two Ai-Furibisha games, Habu finally play Ibisha. Kubo plays Shikenbisha,
which was a small surprise, as recently he usually puts the rook in the centre.
This being said, the Shikenbisha is the opening he has played all his life. The
opening variation here is the famous Fujii System, but 17.P3f is a little unusual.
The Fujii System is designed to discourage the Ibisha side to play Anaguma, and
an important part of it is to push the edge pawn with P1f and P1e to make an early
attack against the Anaguma possible. 17.P3f has been played four times before and
three time by Fujii, who was in the press room during this game. Fujii was not
very forthcoming about the meaning of P3f, but one idea is that B5e (often played
in the Fujii System) can be answered by G4g, in which case the pawn on 3f is the
perfect shape.
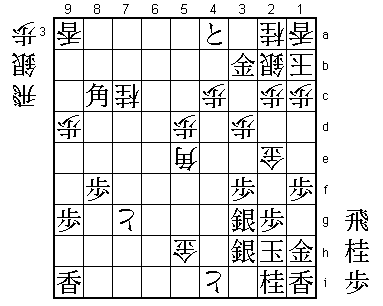
18.P8d-8e 00:05:00 00:43:00
19.B8h-7g 00:17:00 00:43:00
20.P7c-7d 00:17:00 00:43:00
21.K5i-4h 00:18:00 00:43:00
22.S5c-6d 00:18:00 00:45:00
This is a new idea by Habu. The comment in the press room was: "He is not only trying
to beat Kubo who is in front of him, but also Fujii, who is in the press room".
23.S6g-7h 00:22:00 00:45:00
24.N8a-7c 00:22:00 00:50:00
25.K4h-3i 00:28:00 00:50:00
26.P9c-9d 00:28:00 00:51:00
27.S7h-6g 00:38:00 00:51:00
28.R8b-8d 00:38:00 00:55:00
29.P6f-6e 01:17:00 00:55:00
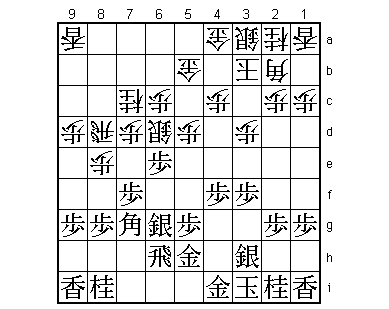
Actually this position looks very much like a position that Kubo and Habu played before,
with the exception of the pawn on 3f, which was on 3g, while the edge pawn was on 1f
instead of 1g. In that game Kubo played 29.R7h and after P7e Habu won the game. Before
29.P6e was played, in the press room the wish was that Kubo would play this move. It
is the most active way of playing this position, but also the most dangerous.
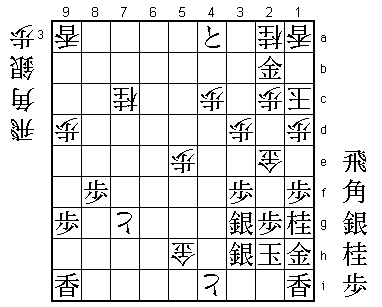
30.S6d-5e 01:17:00 01:46:00
There are two alternatives here. 30.Nx6e doesn't seem to be appealing for white after
31.Bx2b+ Sx2b S6f (S5f is answered by B*7i) P8f Sx6e Px8g+ Sx5d. However, 30.Bx7g+
Nx7g S5e also looks good.
31.S6g-7h 01:21:00 01:46:00
32.P7d-7e 01:21:00 01:56:00
33.P7fx7e 01:25:00 01:56:00
34.S5ex4f 01:25:00 01:56:00
35.B7gx2b+ 02:33:00 01:56:00
36.K3bx2b 02:33:00 02:37:00
37.S7h-7g 02:45:00 02:37:00
38.P8e-8f 02:45:00 02:39:00
39.P8gx8f 02:48:00 02:39:00
40.K2b-1b!? 02:48:00 02:39:00
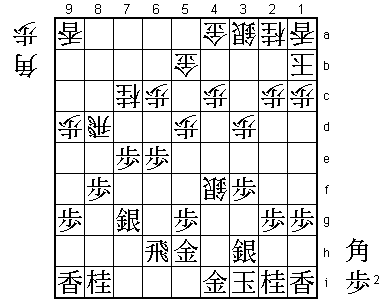
Habu wasn't too sure about this unusual move himself, as he admitted after the game.
However, looking at this game, you cannot but admire Habu's deep understanding of the
flow of this game. Habu has already seen that white will make a promoted pawn and that
this pawn will eat its way through the white pieces on 5b, 4b and 3a. The point of K1b
is that white can just ignore this and play his own attack with a bishop on 5e. In a
way, 40.K1b is already the famous "early escape" that is worth eight moves according
to the proverb. Of course, 40.K1b is only possible because black hasn't pushed the edge
pawn. If black would have the time to start an edge attack, K1b would be suicidal.
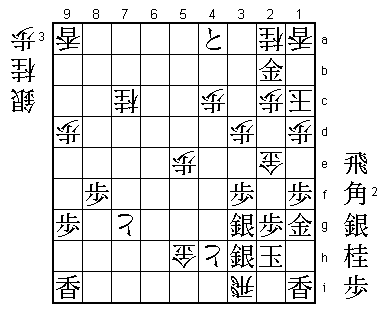
41.P7e-7d 03:11:00 02:39:00
42.R8dx7d 03:11:00 03:01:00
In the press room, this move was criticized. 42.P*7f was considered better, to take
the pawn on 7d only after 43.S8h. Habu spent 22 minutes on it so it seems like he
knew what he was doing.
43.B*8c 03:12:00 03:01:00
44.R7dx7g+ 03:12:00 03:12:00
The point of the suggested 42.P*7f in the press room was that this exchange of rook
for silver is not so good for white. If 42.P*7f S8h, the same silver would be out of
play on 8h, while now it has become a rook in hand for black.
45.N8ix7g 03:13:00 03:12:00
46.B*5e 03:13:00 03:12:00
47.P6e-6d 03:27:00 03:12:00
48.P*7f 03:27:00 03:16:00
49.P6dx6c+ 03:55:00 03:16:00
50.P7fx7g+ 03:55:00 03:16:00
51.R6h-6i 03:59:00 03:16:00
52.N*2d 03:59:00 03:35:00
53.+P6cx5b 04:04:00 03:35:00
54.N2dx3f 04:04:00 03:35:00
55.G*1h 04:08:00 03:35:00
56.S4fx5g+ 04:08:00 04:18:00
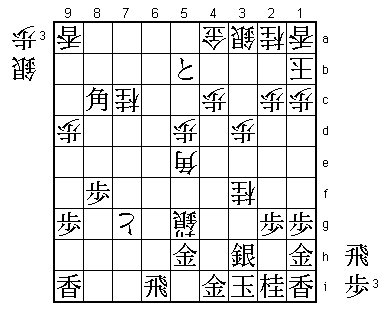
This is a simple mating threat on 2h. Habu puts everything on his attack, only made
possible by having moved the king to 1b. Still, the endgame is very close and difficult.

57.P*3g      04:12:00  04:18:00

Good or not? There are many moves in this game that even top professionals couldn't
judge as good or bad. Here Kimura (8-dan) suggested P*4f Bx4f R*3g. Kimura is one of
the best defenders in the game, but after the game Kubo simply said that he thought
57.P*3g was a good enough defence. In any case, in the press room the general opinion
was that Kubo was better in this position.

58.+S5gx5h   04:12:00  04:21:00
59.G4ix5h    04:12:00  04:21:00
60.G*5g      04:12:00  04:22:00
61.P3gx3f    04:16:00  04:22:00
62.G5gx5h    04:16:00  04:22:00
63.P*4i      04:22:00  04:22:00
This seems to defend and because black has both +Px4a and R6a+ next, it was felt that
Kubo was winning here.

64.P*6h!     04:22:00  04:34:00

Looks slow, but the white king on 1b is just far enough to make this possible. If it
is winning for white is unclear, though...

65.+P5bx4a   04:36:00  04:34:00
66.P6hx6i+   04:36:00  04:34:00
67.S*3g      04:38:00  04:34:00
68.S3a-2b    04:38:00  04:41:00
69.P1g-1f    04:42:00  04:41:00
70.+P6i-5i   04:42:00  04:49:00
71.G*3b      04:49:00  04:49:00
72.+P5ix4i   04:49:00  04:49:00
73.K3i-2h    04:49:00  04:49:00
74.G*2e!     04:49:00  04:53:00
Strong move. The simple plan is to make a strong mating threat with Gx1f, but this gold
also defends the white king when it is forced up the board. The endgame in shogi is
often about finding moves that work both in attack and defence and this is a perfect
example.

75.B8c-5f+   04:54:00  04:53:00

Probably the best move. In the post-mortem analysis 75.K1g was also tried, but taking
the knight with +P3i followed by +Px2i seems too strong.

76.P1c-1d    04:54:00  04:53:00

No choice. If 76.Gx1f then 77.Gx2b Bx2b G1g is good for black.

77.+B5fx5e   04:55:00  04:53:00
78.P5dx5e    04:55:00  04:53:00
79.G3bx2b    04:55:00  04:53:00
80.K1b-1c    04:55:00  04:53:00
81.N2i-1g    04:58:00  04:53:00
This is a mating threat defending against a mating threat, which is often a sign that
the game is over. Again the opinion in the press room was leaning to a win for Kubo.

82.B*3i!     04:58:00  04:53:00

Habu shows that this is far from over. Sacrificing a bishop for the all important
knight on 1g suddenly seems to be winning for black.

83.K2h-2i    04:58:00  04:53:00
84.B3ix1g+   04:58:00  04:53:00
85.G1hx1g    04:58:00  04:53:00
86.R*3i      04:58:00  04:53:00
87.K2i-2h    04:58:00  04:53:00
88.+P4i-4h   04:58:00  04:53:00
And white wins. In the press room this was already labelled as another example of
Habu's brilliant endgame skills. Still, this is not the end yet...

89.S3gx4h?   04:58:00  04:53:00

But now it is! Only here Kubo missed his final chance. The hidden win was 89.S4g!!.
This looks like a completely useless move, but the point is that 90.+Px4g is answered
by 91.Kx3i. If white leaves the silver on 4g, the black king can escape up the board.
After the game Habu said that he must play 90.S*3h here, but then after 91.Gx2c Kx2c
S*3b Kx3b N*2d Kx4a (G*2d R*4b is mate) black has B*7d!. If this is answered by N*5b
then R*6a S*5a B*2c is mate. After B*7d, S*5b is no mate, but then R*7a N*5a B*2c K4b
B3b+ K5c Rx7c+ P*6c +B3a and after white drops another piece Sx3h +Px3h Bx3h is winning
for black.

90.G5hx4h    04:58:00  04:53:00
91.B*5g      04:58:00  04:53:00
92.N*4f      04:58:00  04:57:00
93.B5gx4f    04:58:00  04:57:00
94.S*3e      04:58:00  04:57:00
95.B4fx3e    04:58:00  04:57:00
96.G2ex3e    04:58:00  04:57:00
97.N*2e      04:59:00  04:57:00
98.G3ex2e    04:59:00  04:57:00
99.G2bx2c    04:59:00  04:57:00
100.K1cx2c   04:59:00  04:57:00
101.S*3b     04:59:00  04:57:00
102.K2cx3b   04:59:00  04:57:00
103.N*2d     04:59:00  04:57:00
104.K3b-3c   04:59:00  04:59:00
105.B*4b     04:59:00  04:59:00
106.K3c-4d   04:59:00  04:59:00
107.R*4f     04:59:00  04:59:00
108.N*4e     04:59:00  04:59:00
109.R4fx4h   04:59:00  04:59:00
110.S*3g     04:59:00  04:59:00
Resigns      04:59:00  04:59:00
Mate after 111.Sx3g G*2i or 111.Kx3i Sx4h+ Kx4h B*5g etc. A great game with an endgame
that was too difficult for mere mortals. Kubo will rue the missed chances in this match,
but the score is a resounding three straight wins for Habu to collect his 16th consecutive
Oza title. An unbelievable record. One wonders if there ever will be a player who wrestles
the Oza title from Habu...