49th Osho Match Game 4
Black: Habu Yoshiharu, Osho
White: Sato Yasumitsu, Challenger
49th Osho-sen, Game 4, February 8th and 9th 2000
1.P7g-7f           0/0          0/0
2.P8c-8d           0/0          3/3
3.P2g-2f           3/3          0/3
4.P8d-8e           0/3          10/13
5.B8h-7g           2/5          0/13
6.P3c-3d           0/5          0/13
7.S7i-8h           1/6          0/13
8.G4a-3b           0/6          3/16
9.G6i-7h           3/9          0/16
10.S3a-4b          0/9          4/20
11.B7gx2b+         3/12         0/20
12.G3bx2b          0/12         0/20
13.S8h-7g          0/12         0/20
14.G2b-3b          0/12         2/22
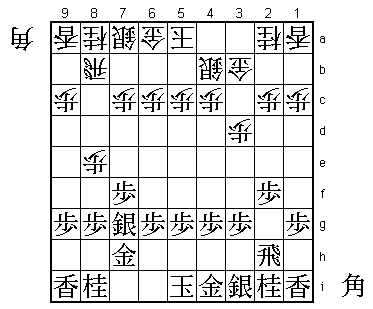
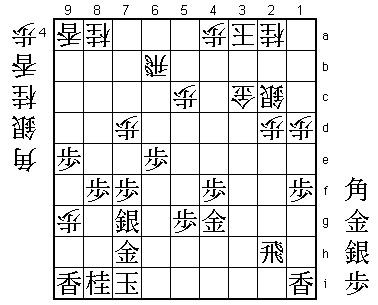
Four different openings in four different games. After Yokofudori, Aigakari
and Shikenbisha, this time the Kakugawari. Sato has had some tough practice
with this opening against Tanigawa in two consecutive Meijin matches, losing
all of his white games against this opening.
15.S3i-3h 4/16 0/22
16.S7a-7b 0/16 0/22
17.P9g-9f 8/24 0/22
18.P9c-9d 0/24 3/25
19.P4g-4f 2/26 0/25
20.P6c-6d 0/26 4/29
21.S3h-4g 2/28 0/29
22.S7b-6c 0/28 1/30
23.K5i-6h 10/38 0/30
24.S6c-5d 0/38 4/34
25.P1g-1f 10/48 0/34
26.P1c-1d 0/48 4/38
27.S4g-5f 1/49 0/38
28.G6a-5b 0/49 13/51
29.K6h-7i 34/83 0/51
30.K5a-4a 0/83 5/56
31.P6g-6f 24/107 0/56
32.P4c-4d 0/107 30/86
33.G4i-5h 8/115 0/86
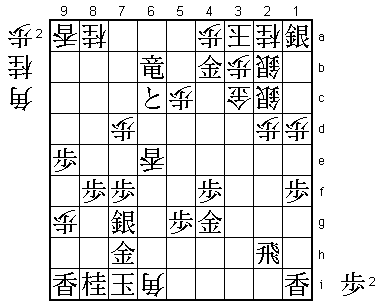
34.P3d-3e!? 0/115 2/88
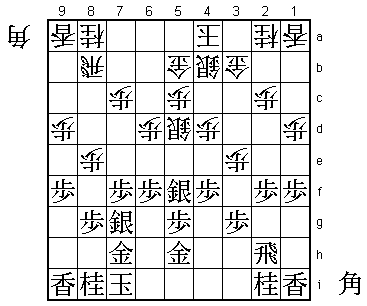
32.P4d followed by 34.P3e is a new, positive idea. Black opening moves have
successfully avoided the P6e position, but gave white time for this plan.

35.P2f-2e          65/180       0/88
36.S4b-3c          0/180        0/88
37.S5f-4g!         4/184        0/88

Pulling back the silver is not a move one likes to play, but black has to act
quickly. If he gives white the time for S3d (for example by playing 37.K8h),
his position will get very bad.

38.P4d-4e          0/184        25/113

Unfortunately for white, S3d is not possible because of the position of the
king on 4a: 38.S3d P2d Px2d Rx2d G2c Rx3d Gx3d B*2c.

39.P4fx4e          5/189        0/113
40.S5dx4e          0/189        0/113
41.P*4f            0/189        0/113
42.S4e-3d          0/189        6/119
43.P3g-3f          11/200       0/119
44.P3ex3f          0/200        25/144
45.S4gx3f          0/200        0/144
46.K4a-3a          0/200        51/195
47.P*3e            64/264       0/195
48.S3d-4c          0/264        1/196
49.N2i-3g          0/264        0/196
50.P7c-7d          0/264        15/211
51.G5h-4g          12/276       0/211
52.R8b-6b          0/276        28/239
53.S3f-4e          12/288       0/239
54.P9d-9e          0/288        168/407
55.P9fx9e          21/309       0/407
56.P6d-6e          0/309        0/407
57.P6fx6e          5/314        0/407
58.P*9g            0/314        0/407
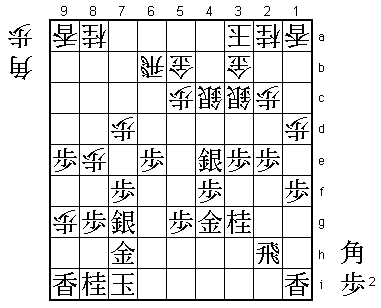
59.P3e-3d 70/384 0/407
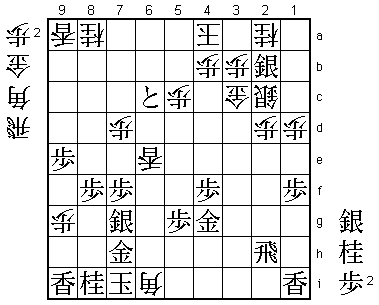
It looks like Habu has won the opening with a nice attacking base on 3d
supported by the silver on 4e. However, the situation is still very difficult.
Habu did not like 59.Lx9g P*9h K8h N7c Kx9h B*6i, so he attacks strongly.
60.S4cx3d 0/384 5/412
61.P2e-2d 0/384 0/412
Better than the simple 61.Sx3d Sx3d B*5e, which is too slow.
62.P2cx2d 0/384 1/413
63.P*2b 0/384 0/413
64.G3bx2b 0/384 2/415
65.S4ex3d 1/385 0/415
66.S3cx3d 0/385 0/415
67.N3g-4e 0/385 0/415
68.P8e-8f! 0/385 26/441
This move shows that the position is still far from clear. Habu has a very
tough decision now: attack or defend.
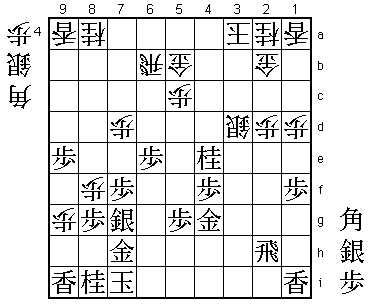
69.B*4d 58/443 0/441
After 58 minutes, he chooses to attack. No way to tell which is better.
70.S3dx4e 0/443 2/443
71.P*2c 0/443 0/443
72.G2bx2c 0/443 0/443
73.B4dx1a+ 0/443 0/443
74.B*3c 0/443 10/453
75.+B1a-1b 14/457 0/453
76.S4e-3d 0/457 0/453
77.L*3i 0/457 0/453
78.G5b-4c 0/457 0/453
79.+B1bx2c 0/457 0/453
80.S3dx2c 0/457 0/453
81.L3ix3c+ 0/457 0/453
82.G4cx3c 0/457 2/455
83.P8gx8f 4/461 0/455
84.P*4a! 0/461 7/462
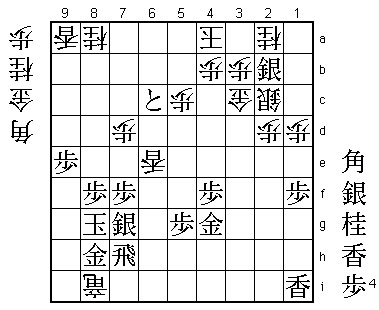
Strong move. Playing a defence only move at this stage is very brave. Sato
anticipates that he has to give up the rook at some point and defends against
a future rook drop in advance.

85.B*6d!           3/464        0/462

Even braver reply by Habu. Despite Sato's P*4a, he still wants the rook.
Moreover, he gives up sente in the process.

86.R6bx6d          0/464        3/465
87.P6ex6d          0/464        0/465
88.L*6e            0/464        2/467
89.P6d-6c+!        8/472        0/467

Probably the only way to have a chance to win this game. Still, the following
white attack looks very frightening...

90.B*6i            0/472        4/471
91.R*8b            1/473        0/471
92.P*6b            0/473        2/473
93.R8bx6b+         1/474        0/473
94.P*3b            0/474        0/473
95.S*1a            1/475        0/473
96.S*2b            0/475        0/473
97.G*4b!           0/475        0/473
If this would lead to a forced win, this move would deserve two exclamation
marks. Habu is giving up both a gold and a promoted rook for an attack that
looks dubious. He felt that he had no other option here.

98.P4ax4b          0/475        0/473
99.+R6b-6a         0/475        0/473
100.N*4a           0/475        4/477
101.+R6ax4a        0/475        0/477
102.K3ax4a         0/475        0/477
103.S1ax2b=        0/475        0/477
104.B6ix7h+?       0/475        1/478

Close to byoyomi, Sato crumbles under Habu's pressure. Black is only
threatening mate on 5b, so the position is definitely not a hisshi. However,
it is surprisingly hard to defend. The obvious 104.B*3d, which both attacks
and defends, fails to 105.N*4e, while 104.R*9b loses after 105.P*6b. Sato's
only way out was 104.G*6a N*6d B*3d S*4e B4c N7b+ and the position is still
unclear. Instead, Sato's goes for a mate that isn't there.

105.R2hx7h         0/475        0/478
106.R*6i           0/475        0/478
107.K7i-8h         0/475        0/478
108.G*9h           0/475        1/479
109.L9ix9h         0/475        0/479
110.P9gx9h+        0/475        0/479
111.K8hx9h         0/475        0/479
112.L*9f           0/475        0/479
113.S*9g           2/477        0/479

Now there is no mate and no defence. Sato tries for a little longer, but
in vain.

114.L9fx9g+        0/477        0/479
115.K9hx9g         0/477        0/479
116.P*9f           0/477        0/479
117.K9gx9f         0/477        0/479
118.S*8g           0/477        0/479
119.K9fx8g         0/477        0/479
120.R6ix8i+        0/477        0/479
121.G*8h           0/477        0/479
Resigns            0/477        0/479
Time:              07:57:00     07:59:00
So the Osho title match between the holder of four crowns and the Meijin ends
in a surprising sweep for Habu. In all games the pattern was the same, with
Sato losing close games by making vital mistakes in the endgame. Habu's
legendary endgame skills prevailed again.