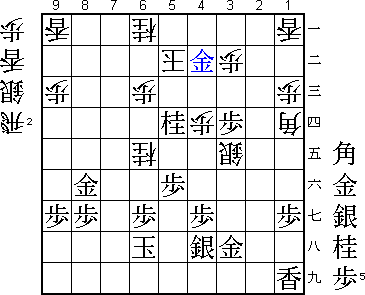
48th Osho Match Game 5
Black: Habu, Osho
White: Morishita, Challenger
48th Osho-sen, Game 5, February 23rd and 24th 1999
1.P2g-2f 1/1 0/0
2.P3c-3d 0/1 2/2
This was a big surprise for Habu. Morishita is very reliable in his opening
choices as white. He plays 2.P8d after either 1.P7f or 1.P2f. Playing
2.P3d is clearly aiming at surprise.
3.P7g-7f 3/4 0/2
4.P8c-8d 0/4 1/3
5.P2f-2e 3/7 0/3
6.P8d-8e 0/7 0/3
7.G6i-7h 2/9 0/3
8.G4a-3b 0/9 2/5
9.P2e-2d 2/11 0/5
10.P2cx2d 0/11 0/5
11.R2hx2d 0/11 0/5
12.P8e-8f 0/11 1/6
13.P8gx8f 2/13 0/6
14.R8bx8f 0/13 0/6
15.R2dx3d 3/16 0/6
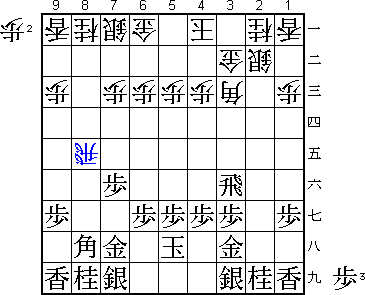
16.B2b-3c 0/16 3/9
17.R3d-3f 40/56 0/9
18.S3a-2b 0/56 5/14
19.G4i-3h 8/64 0/14
20.K5a-4a 0/64 21/35
21.K5i-5h 8/72 0/35
22.R8f-8e 0/72 11/46
Of course Morishita has studied this deeply. This move is very fashionable
lately, almost as much as the Fujii system. Results for white have been
very good with a winning percentage of more than 70%. No wonder Morishita
decided to give it a try in this game that he must win. Popular as it has
been, this is the first time this move is played in a title match.
23.B8hx3c+ 49/121 0/46
24.N2ax3c 0/121 63/109
25.S7i-8h 5/126 0/109
26.R8e-8b 0/126 7/116
This is not how this position is meant to be played. Natural would have been
26.R8d, but Morishita feared 27.N7g with pressure on the rook. After the game
both players looked at 28.B*8i G7i P*8g P*8e and 28.P*8g Sx8g P*8f S9h
B*8g Gx8g Px8g+ P*8e, but it seems that these variations are a little
too wild and that black will be able to cash in his material.
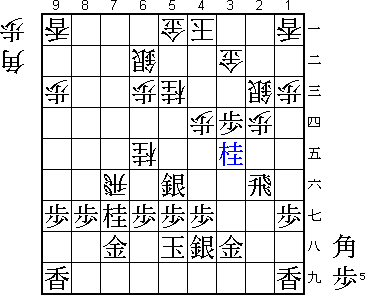
27.P*8g 26/152 0/116
28.S7a-6b 0/152 27/143
29.R3f-2f 48/200 0/143
30.G6a-5a 0/200 21/164
31.P3g-3f 20/220 0/164
32.R8b-8d 0/220 18/182
Usually the Yokofudori is a balance between the pawn that black has won and
the moves for development that white has in return. However, in this game
the white rook moves mean that white has no compensation for the lost pawn.
Morishita's attempt at this strategy has failed: Habu has the advantage.
33.S3i-4h 14/234 0/182
34.P5c-5d 0/234 10/192
35.S8h-7g 34/268 0/192
36.P5d-5e 0/268 9/201
37.N2i-3g 33/301 0/201
38.P7c-7d 0/301 24/225
39.S7g-6f 12/313 0/225
40.N8a-7c 0/313 23/248
41.P3f-3e 5/318 0/248
42.P7d-7e 0/318 8/256
43.S6fx5e 5/323 0/256
Habu is extending his advantage. This silver has moved from 8h to the centre
square of the board. The threat is P*3d Rx3d B*5f followed by P*3d again.
44.P*2d! 0/323 82/338
These moves are the reason why Morishita is a top player. Especially in
positions where he is in trouble, he is able to find great defensive
solutions. We will see that later in the game again. The pawn drop creates
an escape square for the knight on 2e. Most players would choose to try and
break free with 44.P*8f Px8f Rx8f P*8h Rx7f Rx7f Px7f to get a rook in hand,
but after P3d or P*2c the white position collapses quickly.
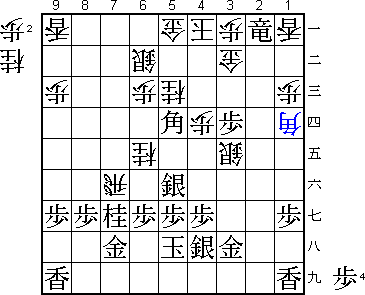
45.B*6f 53/376 0/338
46.S2b-2c 0/376 34/372
47.B6fx7e 6/382 0/372
48.R8d-9d 0/382 9/381
49.N8i-7g 6/388 0/381
50.P*3d 0/388 2/383
51.S5e-4f 14/402 0/383
52.R9d-7d 0/402 14/397
53.N3g-4e 11/413 0/397
54.N3cx4e 0/413 4/401
55.S4fx4e 0/413 0/401
56.N*5c 0/413 0/401
57.S4e-5f 7/420 0/401
58.B*4d 0/420 7/408
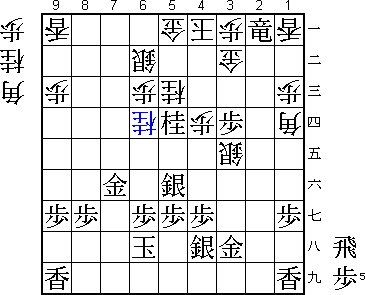
59.B7e-6f?! 0/420 0/408
Habu decides it is time to try and cash in his advantage. However, it would
have been safer to wait one more move and play 59.R2i instead. The following
sequence looks very strong for black, but Morishita has another defensive
rabbit in his hat.
60.R7dx7f 0/420 1/409
61.B6fx4d 15/435 0/409
62.P4cx4d 0/435 0/409
63.P3ex3d 9/444 0/409
64.N7c-6e 0/444 28/437
65.N*3e 13/457 0/437
And white loses quickly, or...

66.S2cx3d          0/457        7/444

Too weak are 66.P*5e or 66.Nx7g+, since there is no way to get to the black
king after Nx2c+.

67.R2fx2d          0/457        0/444
68.S3dx3e          0/457        0/444
69.R2d-2a+         0/457        0/444
70.P*3a            0/457        0/444
71.P*3c            1/458        0/444
72.G3bx3c          0/458        7/451
73.P*3d            0/458        0/451
74.G3c-3b          0/458        0/451
75.B*5d            0/458        0/451
76.B*1d!           0/458        3/454
Great play by Morishita. This bishop defends on 3b and aims at a counter
attack with N*4f. Black has to defend against that and suddenly Morishita's
pieces come back to life.

77.K5h-6h          2/460        0/454
78.N6ex7g+         0/460        0/454
79.G7hx7g          0/460        0/454
80.R7f-7d          0/460        0/454
81.N*6f            0/460        0/454
82.R7dx5d          0/460        0/454
83.N6fx5d          0/460        0/454
84.P*7f            0/460        0/454
85.G7gx7f          2/462        0/454
86.N*6d            0/462        0/454
87.G7f-8f!         2/464        0/454

Unnatural move, but the only move that still wins. It is unfortunate for
Morishita that his efforts are not enough to win. After either G7e or
G6f white wins with 88.B*9e.

88.N6dx5f          0/464        8/462
89.P5gx5f          0/464        0/462
90.N*6e            0/464        0/462
91.N5dx6b+         2/466        0/462
92.B*7g            0/466        0/462
93.K6h-7h          1/467        0/462
94.B7gx9i+         0/467        4/466
95.+N6bx5a         4/471        0/466
96.K4ax5a          0/471        0/466
97.R*7a            0/471        0/466

"After dropping this rook it is clearly won" (Habu). Indeed, this attacking
move also defends against the white mating threat.

98.N*6a            0/471        0/466
99.N*5d            0/471        0/466
100.+B9i-7g        0/471        11/477
101.R7ax7g+        0/471        0/477
102.N6ex7g+        0/471        0/477
103.K7hx7g         0/471        0/477
104.N5c-6e         0/471        0/477
105.K7g-6h         1/472        0/477
106.K5a-5b         0/472        2/479
107.+R2ax3b        0/472        0/479
108.P3ax3b         0/472        0/479
109.G*4b           0/472        0/479
Resigns            0/472        0/479
Time:              07:52:00     07:59:00
And mate after 110.K5c B*6b K6d S*7e Kx5d G*5e.

With this victory Habu takes his fourth consecutive Osho title. He is still
a long way from Oyama, who seems to have an unbeatable 20 Osho titles.
The disaster of the first game seemed to have helped Habu to get focussed
and raise his game to a level we have not seen much of him lately. Morishita,
on the other hand, again finds himself the loser in a title match. Winning
a title match against Habu has only be done by very few players and one
wonders if Morishita will ever be a member of this special club...