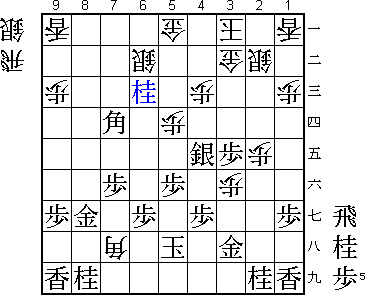
47th Oza Match Game 4
Black: Maruyama, Challenger
White: Habu, Oza
47th Oza-sen, Game 4, October 8th 1999
1.P7g-7f 0/0 0/0
2.P3c-3d 0/0 2/2
3.P2g-2f 0/0 0/2
4.P8c-8d 0/0 1/3
5.P2f-2e 0/0 0/3
6.P8d-8e 0/0 1/4
7.G6i-7h 1/1 0/4
8.G4a-3b 0/1 1/5
9.P2e-2d 0/1 0/5
10.P2cx2d 0/1 1/6
11.R2hx2d 0/1 0/6
12.P8e-8f 0/1 3/9
13.P8gx8f 0/1 0/9
14.R8bx8f 0/1 0/9
15.R2dx3d 0/1 0/9
16.B2b-3c 0/1 2/11
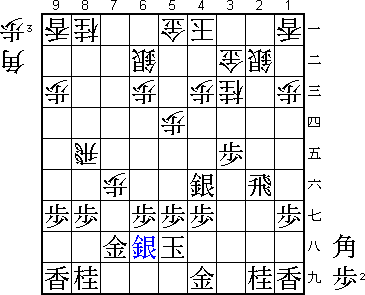
17.R3d-3f 5/6 0/11
18.S3a-2b 0/6 5/16
19.P*8g 4/10 0/16
20.R8f-8e 0/10 2/18
The third time this is played in this match. The difference is that Habu
is white this time. Playing the R8e Yokofudori with white against Maruyama,
who is considered the biggest expert in this opening, shows confidence and
perhaps even a little bluff.
21.R3f-2f 0/10 0/18
22.K5a-4a 0/10 5/23
23.K5i-5h 8/18 0/23
24.S7a-6b 0/18 3/26
25.S3i-3h 6/24 0/26
26.G6a-5a 0/24 9/35
27.P3g-3f 1/25 0/35
28.P7c-7d 0/25 35/70
29.S3h-3g 66/91 0/70
30.P5c-5d 0/91 35/105
31.S3g-4f 4/95 0/105
32.P7d-7e 0/95 7/112
33.B8hx3c+ 3/98 0/112
34.N2ax3c 0/98 0/112
35.P3f-3e 0/98 0/112
36.P7ex7f 0/98 2/114
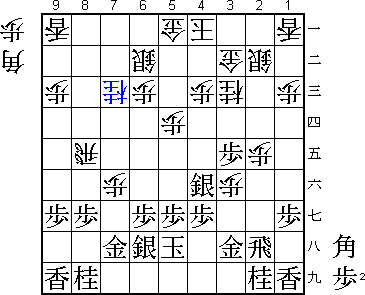
37.S7i-6h! 0/98 0/114
A simple move, but very strong. This strengthens both 7g and 5g and takes
away white's attacking possibilities. Too aggressive would have been 37.P3d
because of 38.R2e.

38.P*2e            0/98         99/213

Definitely a move white does not want to play, so it is no wonder Habu spent
so much time on it (99 minutes out of a total of 5 hours). P*2e block square
2e for the white rook, so P3d becomes a serious problem. The move white wants
to play is 38.N7c, but after P7d N6e P7c+ Sx7c B*9f black gets a big advantage.
Another move is 38.P*2d, threatening to play 40.S2c next, but after the strong
39.Rx2d P*2e (threatens to win the rook) P3d! it is black who gets the upper
hand.

39.R2f-2h          42/140       0/213
40.P*3f            0/140        10/223
41.G4i-3h          6/146        0/223

Simple but strong. White still has problems to find something useful to do.

42.N8a-7c          0/146        1/224
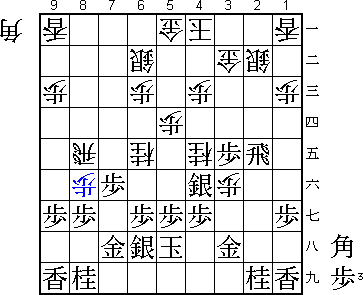
43.P*7g?           41/187       0/224

This move is also in Maruyama style, as it is trying to take away white's
options. However, in this case it does not work and suddenly white is able
to break free. The correct way to continue is 43.B*6f, threatening 45.P3d
N4e P*2c. If white answers B*6f for example with 44.B*4d, then 45.Bx4d
Px4d P3d N4e P*2c Gx2c (Sx2c P3c+ Gx3c B*2b) B*4c S5c B2a+ and the threat
P*2d is a big problem. It seems white can only defend against this with
B*2d after which the black advantage is clear.

44.N7c-6e          0/187        6/230
45.P7gx7f          2/189        0/230
46.N3c-4e          0/189        1/231
47.R2hx2e          10/199       0/231
48.P*8f            0/199        19/250
49.B*9f            0/199        0/250

The only move. After 49.Px8f Rx8f P*8g Rx7f P*7g Rx4f Px4f P3g+ Nx3g B*3f
black loses the rook on 2e.

50.P8fx8g+         0/199        0/250
51.G7hx8g          0/199        0/250
52.N6ex5g+         0/199        1/251
53.S6hx5g          1/200        0/251
54.N4ex5g+         0/200        0/251
55.S4fx5g          2/202        0/251
56.R8e-5e          0/202        4/255
57.P*5f            0/202        0/255
58.R5e-4e          0/202        0/255
59.N*7e            3/205        0/255
60.P*8e            0/205        3/258
61.B9fx8e          0/205        0/258
62.K4a-3a          0/205        0/258
63.B8e-7d          4/209        0/258
64.B*7h!           0/209        10/268
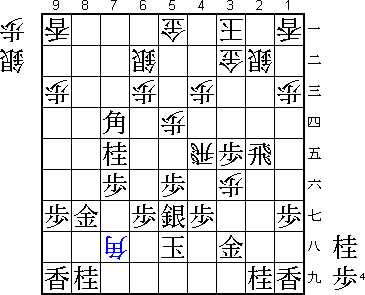
Good move. Neither N*3d nor N*2d is a mating threat, so white wins with S*6i
after either of these moves.

65.S5g-4f          2/211        0/268

Or 65.G8h S*6i K6h Rx7e Gx7h (Px7e N*7f forks king and gold) Sx7h+ Kx7h
Rx7d and black has no more hope of a decent attack.

66.P*2d            0/211        1/269
67.S4fx4e?!        26/237       0/269

Quickens the end. However, after 67.R2g Rx7e Px7e Bx8g+ white also wins.

68.P2dx2e          0/237        0/269
69.N7ex6c=         0/237        0/269
Nx5a+ next is a mating threat, so it looks like black still has some play...
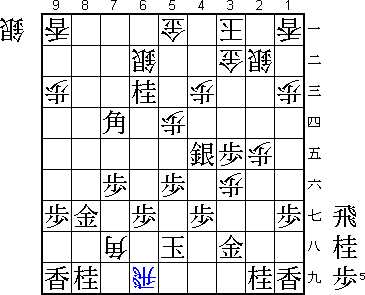
70.R*6i! 0/237 4/273
Resigns 8/245 0/273
Time: 04:05:00 04:33:00
Maruyama took 8 minutes to realise that this move ends the game immediately.
The white threat is Bx6g+ and mate. There is no good defence against this.
For example, 71.G7g fails to the hisshi 72.S*6h.
The post-mortem analysis seemed to indicate that after 43.P*7g Maruyama
never really had a chance to win anymore. A little disappointing end to
what looked like a very interesting match for three games. In the end
Habu won all three games with the R8e Yokofudori. As this was supposed
to be Maruyama's strong point, the match result should not be too
surprising. Still, Maruyama had the better play after the opening in all
games, and it is surprising that he was not able to convert this advantage
in three of the games. Habu seems to be indeed a very difficult opponent
for Maruyama. Of course he is not alone in that.

For Habu this is his 8th consecutive Oza title, extending his own record.
He is still only halfway Nakahara's total of 16 Oza titles, though...