46th Oi Match Game 4
[Black "Habu Yoshiharu, Oi"]
[White "Sato Yasumitsu, Challenger"]
[Event "46th Oi-sen, Game 4"]
[Date "August 24th and 25th 2005"]
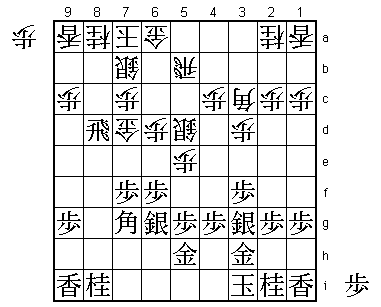
1.P7g-7f 00:00:00 00:00:00
2.P3c-3d 00:00:00 00:04:00
3.P6g-6f 00:01:00 00:04:00
4.B2b-3c 00:01:00 00:27:00
5.B8h-7g 00:11:00 00:27:00
6.R8b-2b 00:11:00 00:40:00
7.S3i-4h 00:17:00 00:40:00
8.S3a-4b 00:17:00 00:40:00
9.P3g-3f 00:23:00 00:40:00
10.P5c-5d 00:23:00 00:44:00
11.S4h-3g 00:39:00 00:44:00
12.S4b-5c 00:39:00 00:44:00
13.R2h-8h 00:45:00 00:44:00
Something that would be unthinkable ten year ago: Habu and Sato
playing Ai-Furibisha. Both have been playing Furibisha numerous times,
so Ai-Furibisha has become an option, but this is the first time
(in their 93rd mutual game) that Habu and Sato play this opening.
Black's strategy is to get a pawn in hand by exchanging pawns on the
8th file and to build a yagura castle.
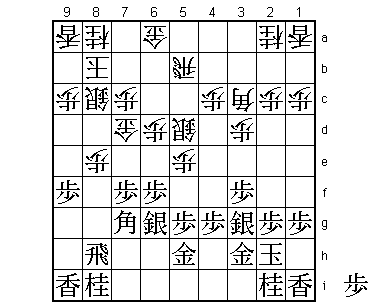
14.K5a-6b 00:45:00 00:47:00
15.S7i-6h 00:54:00 00:47:00
16.S7a-7b 00:54:00 00:59:00
17.S6h-6g 01:02:00 00:59:00
18.K6b-7a 01:02:00 01:04:00
19.G6i-5h 01:11:00 01:04:00
20.G4a-5b 01:11:00 01:14:00
21.P8g-8f 01:24:00 01:14:00
22.P6c-6d 01:24:00 02:03:00
23.P8f-8e 01:38:00 02:03:00
24.G5b-6c 01:38:00 03:14:00
25.K5i-4h 02:04:00 03:14:00
26.P5d-5e 02:04:00 03:18:00
27.G4i-3h 03:01:00 03:18:00
28.S5c-5d 03:01:00 03:20:00
29.K4h-3i 03:02:00 03:20:00
30.R2b-5b 03:02:00 04:12:00
31.P8e-8d 03:34:00 04:12:00
32.P8cx8d 03:34:00 04:16:00
33.R8hx8d 03:37:00 04:16:00
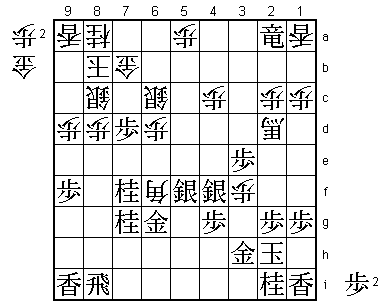
34.G6c-7d 03:37:00 04:17:00
When Ai-Furibisha specialist Fujii saw this move, he couldn't help
but thinking that Habu had won this game. Putting the gold in front
of the pawn is a big positional sin and Fujii found it "unthinkable".
Still, there is a perfectly good reason for this move. Sato doesn't
want to allow Habu getting what he wants (a pawn in hand and an open
rook file) without a fight. Furthermore, he didn't like 34.P*8c R8h B2d
P2f P1d P1f S4e P4f Sx4f S4h, but that might have been underestimating
his chances. For example, after P5f Px5f P*5e P*4g Px5f Px4f Bx4f things
are far from clear. Habu said that this variation was too frightening to
actually try in a real game. 34.G7d might be a strange-looking move, it is
too early to discard it as a failed experiment.
35.R8d-8h 03:42:00 04:17:00
36.P*8e 03:42:00 04:17:00
37.K3i-2h 03:50:00 04:17:00
38.K7a-8b? 03:50:00 04:23:00
The natural move, but based on an oversight. After the game, Sato said he
should have played 38.S8c here. The reason for playing K8b first is that
this keeps the white position compact, while after 38.S8c the pieces are
all over the place. However, after K8b white is going to be one move late
in defending against the black threats.
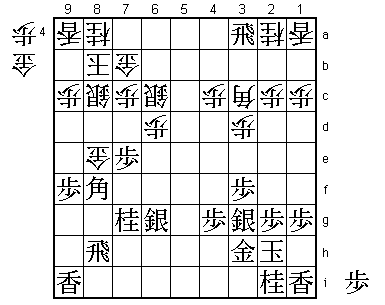
39.P9g-9f 04:21:00 04:23:00
40.S7b-8c? 04:21:00 04:26:00
If Sato would have seen what was coming, he would have played 40.P9d here.
Why this is so will become clear soon. If black then goes for the pawn on
8e with 41.N9g then 42.S8c Nx8e G7b is alright for white.
41.P*8f! 04:33:00 04:26:00
42.P8ex8f 04:33:00 04:30:00
43.B7gx8f 04:33:00 04:30:00
44.P*8e 04:33:00 05:00:00
45.B8f-9g 04:35:00 05:00:00
The difference between the position after move 40 is only the position of
the bishop, but this is a huge difference. Habu wants to develop the silver
on 6g and with the bishop on 9g he can do that because the threat is P7e
followed by S7f next and there is nothing white can do about that. This is
the reason why 40.P9d would have been better. Then white can start a counter
attack on the edge with 46.P9e.
46.S5d-6c 04:35:00 05:04:00
47.N8i-7g 04:43:00 05:04:00
48.G6a-7b 04:43:00 05:52:00
49.P7f-7e 05:15:00 05:52:00
50.G7d-8d 05:15:00 05:52:00
51.S6g-7f 05:15:00 05:52:00
52.P5e-5f 05:15:00 05:57:00
53.P5gx5f 05:15:00 05:57:00
54.R5bx5f 05:15:00 05:57:00
55.P*8f 05:15:00 05:57:00
56.P8ex8f 05:15:00 06:22:00
57.P*8e 05:15:00 06:22:00
58.G8d-9d 05:15:00 06:24:00
59.B9gx8f 05:28:00 06:24:00
60.R5fx6f 05:28:00 06:25:00
61.G5h-6g 05:29:00 06:25:00
62.R6fx6g+ 05:29:00 06:25:00
63.S7fx6g 05:29:00 06:25:00
64.G9dx8e 05:29:00 06:25:00
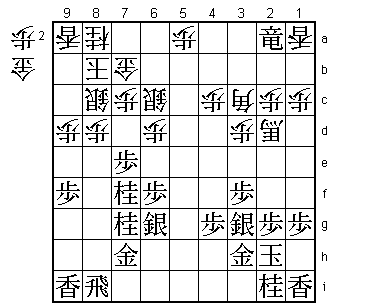
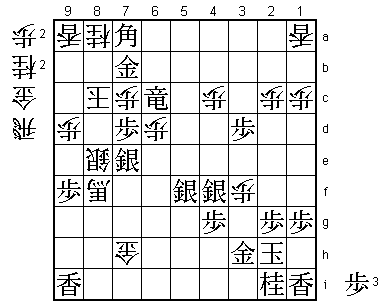
65.R*3a! 05:40:00 06:25:00
Good move. If white now plays 66.Gx8f Rx8f Bx7g+ then Rx8c+ is very strong
(Gx8c S*7a K9b P*8d or Kx8c Rx8a+ G*8b +Rx9a are both winning for black). Also,
defending with 66.P*8d is not good after 67.Nx8e Bx8h+ Nx7c+ Gx7c Rx2a+ and
black has the threats N*7d or N*9e next.

66.P9c-9d    05:40:00  07:17:00

There are two ways of looking at this move. First, it takes a lot of nerve to
play a quiet defense move if the board is on fire. On the other hand, if a move
like P9d is necessary in a position like this, it means that white has no proper
defense. Both may be true, but the fact is that black has no immediate knock-out
after 66.P9d and white can still hope for a mistake.

67.P*6f      06:16:00  07:17:00
68.G8ex8f    06:16:00  07:17:00
69.R8hx8f    06:16:00  07:17:00
70.P*8d      06:16:00  07:17:00
71.R3ax2a+   06:16:00  07:17:00
72.B*6h      06:16:00  07:17:00
73.G*7h      06:21:00  07:17:00
74.B6h-2d+   06:21:00  07:17:00
75.N*7f      06:21:00  07:17:00
76.P*5a      06:21:00  07:25:00
77.R8f-8i!   06:29:00  07:25:00
The simple way of playing would be 77.Nx8d Sx8d Rx8d P*8c R8i, but Habu is aiming
at taking away all of the white attacking options. Good if it works, but it
requires deep calculation.

78.P3d-3e    06:29:00  07:33:00
79.P3fx3e    06:30:00  07:33:00
80.P7c-7d    06:30:00  07:33:00
81.P7ex7d    06:34:00  07:33:00
82.P*3f      06:34:00  07:36:00
83.S3g-4f    06:39:00  07:36:00
84.B3c-4d    06:39:00  07:39:00
85.S6g-5f    06:45:00  07:39:00
86.B4dx6f    06:45:00  07:42:00
87.G7h-6g    06:49:00  07:42:00
Cool play. Habu is not worried at all about the white bishops.

88.+B2d-3c   06:49:00  07:43:00
89.P3e-3d    07:00:00  07:43:00
90.+B3c-4d   07:00:00  07:43:00
91.+R2ax5a   07:12:00  07:43:00
92.G*7h      07:12:00  07:57:00
93.R8i-8f    07:17:00  07:57:00
94.B6fx7g+   07:17:00  07:57:00
95.G6gx7g    07:17:00  07:57:00
96.+B4dx7g   07:17:00  07:57:00
97.N7fx8d    07:19:00  07:57:00
98.+B7gx8f   07:19:00  07:57:00
99.N8dx7b+   07:19:00  07:57:00
100.S6cx7b   07:19:00  07:58:00
101.B*7a     07:20:00  07:58:00
102.K8b-9b   07:20:00  07:58:00
103.P*8d     07:20:00  07:58:00
104.S8cx8d   07:20:00  07:58:00
105.G*8b     07:22:00  07:58:00
106.K9b-9c   07:22:00  07:58:00
107.+R5a-5c  07:22:00  07:58:00
108.P*7c     07:22:00  07:59:00
109.G8bx7b   07:22:00  07:59:00
110.K9c-8c   07:22:00  07:59:00
111.+R5c-6c  07:22:00  07:59:00
112.S8d-8e   07:22:00  07:59:00
113.S*7e     07:22:00  07:59:00
Resigns      07:22:00  07:59:00
Mate after 114.+Bx7e Px7c+ Nx7c +Rx7c K9b +R8b and there is no defense. A very
strong game by Habu, who seems to have benefited a lot from the three weeks
between the 3rd and the 4th game. A little bit of rest might have been exactly
what he needed. Sato, on the other hand, might have suffered a little from the
summer vacation, which came at the time when he was in top form. Let's see how
this match develops next.