35th Kio Match Game 5
[Black "Sato Yasumitsu, Challenger"]
[White "Kubo Toshiaki, Kio"]
[Event "35th Kio-sen, Game 5"]
[Date "March 30th 2010"]
1.P7g-7f 00:00:00 00:00:00
The furigoma resulted in three tokins, giving challenger Sato the black pieces in
the fifth and decisive game of this Kio match. This was a hard-fought match, but
they don't come much tougher than what happened in this game...
2.P3c-3d 00:00:00 00:00:00
3.P2g-2f 00:00:00 00:00:00
4.P5c-5d 00:00:00 00:00:00
5.P2f-2e 00:00:00 00:00:00
6.R8b-5b 00:00:00 00:00:00
Of course the Gokigen Nakabisha. The question is: what has Sato prepared?
7.S3i-4h 00:00:00 00:00:00
8.P5d-5e 00:00:00 00:01:00
9.K5i-6h 00:00:00 00:01:00
10.B2b-3c 00:00:00 00:02:00
11.P3g-3f 00:00:00 00:02:00
12.K5a-6b 00:00:00 00:09:00
13.S4h-3g 00:00:00 00:09:00
14.K6b-7b 00:00:00 00:09:00
15.S3g-4f 00:03:00 00:09:00
16.G4a-3b 00:03:00 00:13:00
17.K6h-7h 00:06:00 00:13:00
18.K7b-8b 00:06:00 00:16:00
19.S7i-6h 00:12:00 00:16:00
20.S3a-4b 00:12:00 00:18:00
21.S6h-7g 00:31:00 00:18:00
22.S4b-5c 00:31:00 00:19:00
23.P3f-3e 00:32:00 00:19:00
This is the most popular attacking strategy these days: moving the left silver to 4f
and attacking the head of the bishop next.
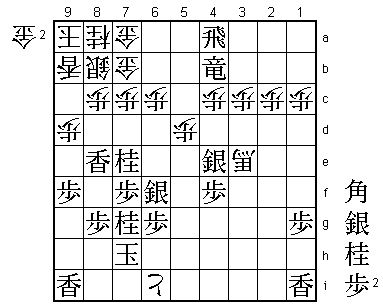
24.P3dx3e 00:32:00 00:27:00
25.S4fx3e 00:32:00 00:27:00
26.S5c-6d 00:32:00 00:43:00
27.P*3d 00:57:00 00:43:00
28.B3c-2b 00:57:00 01:08:00
29.P2e-2d 01:21:00 01:08:00
30.P2cx2d 01:21:00 01:08:00
31.R2hx2d 01:21:00 01:08:00
It looks like black can break through with 31.Sx2d, but after 32.B4d white can strongly
develop his major pieces. For example, 33.S3e Bx3e Rx2a+ S7b is good for black because
even if black picks up a second piece for the silver after +Rx1a, "the bishop on 8h
is in a hideous position, making it impossible for the static rook side to win" (Sato).
32.P*2c 01:21:00 01:32:00
33.R2d-2f 01:23:00 01:32:00
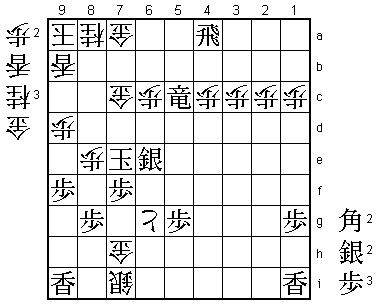
34.L9a-9b 01:23:00 01:34:00
This preparation move for the Anaguma took Sato completely by surprise. Kubo had a
simple explanation: "If one has the opportunity to move into a stronger castle, it
is better to take that opportunity".
35.S7g-6f 02:15:00 01:34:00
Sato took 52 minutes for this move, which clearly shows that he hadn't prepared
for this development.
36.K8b-9a 02:15:00 01:38:00
37.G6i-6h 02:23:00 01:38:00
38.S7a-8b 02:23:00 01:38:00
39.P9g-9f 02:23:00 01:38:00
40.P7c-7d 02:23:00 01:41:00
41.G4i-5h 02:25:00 01:41:00
42.G6a-7a 02:25:00 01:45:00
43.B8h-9g 02:27:00 01:45:00
44.P7d-7e 02:27:00 02:09:00
45.P7fx7e 02:27:00 02:09:00
46.P5e-5f 02:27:00 02:10:00
47.P5gx5f 02:37:00 02:10:00
48.P*5e 02:37:00 02:14:00
49.S3e-4f 02:43:00 02:14:00
50.P5ex5f 02:43:00 02:15:00
51.P7e-7d 02:43:00 02:15:00
52.P4c-4d 02:43:00 02:38:00
53.N2i-3g 02:51:00 02:38:00
54.B2b-3a 02:51:00 02:44:00
55.R2f-3f 03:10:00 02:44:00
56.B3a-4b 03:10:00 02:45:00
57.P*2b 03:17:00 02:45:00
58.G3bx2b 03:17:00 02:46:00
59.S4f-3e 03:17:00 02:46:00
60.G2b-3b 03:17:00 02:47:00
61.S3ex4d 03:23:00 02:47:00
62.R5b-5d 03:23:00 02:51:00
63.P3d-3c+ 03:28:00 02:51:00
64.N2ax3c 03:28:00 02:56:00
65.R3f-3d 03:28:00 02:56:00
66.P*3f 03:28:00 03:03:00
67.P*5e 03:29:00 03:03:00
68.S6dx5e!   03:29:00  03:14:00

Great move by the "Sabaki Artist" Kubo. This temporary sacrifice of the silver
brings all the white pieces to life.

69.B9gx4b+   03:39:00  03:14:00
70.G3bx4b    03:39:00  03:15:00
71.S6fx5e    03:42:00  03:15:00
72.R5dx7d    03:42:00  03:16:00
73.P*7f      03:43:00  03:16:00
74.P3fx3g+   03:43:00  03:18:00

Not only has white made a strong tokin on 3g and exchanged the passive bishop on 4b,
he has forced black to drop a pawn on the 7th file, so black no longer has the pawn
 drop on 7b to shake up the anaguma castle.

75.B*6e      03:43:00  03:18:00
76.R7d-8d    03:43:00  03:25:00
77.S*7e      03:45:00  03:25:00
78.R8dx4d    03:45:00  03:31:00
79.R3dx4d    03:46:00  03:31:00
80.P*4c      03:46:00  03:32:00
81.R4d-5d    03:48:00  03:32:00
82.P*7g      03:48:00  03:39:00
83.N8ix7g    03:49:00  03:39:00
84.B*3f      03:49:00  03:39:00
85.R5d-5a+   03:54:00  03:39:00
86.+P3gx4g   03:54:00  03:39:00
87.G5hx4g    03:54:00  03:39:00
88.B3fx4g+   03:54:00  03:39:00
89.+R5ax4b   03:54:00  03:39:00
90.S*5i      03:54:00  03:41:00
91.G*5h      03:55:00  03:41:00
92.S5ix6h+   03:55:00  03:41:00
93.G5hx6h    03:55:00  03:41:00
94.P5f-5g+   03:55:00  03:46:00
95.B6ex4g    03:55:00  03:46:00
96.+P5gx4g   03:55:00  03:46:00
97.B*3e      03:57:00  03:46:00
98.N*5f      03:57:00  03:51:00
99.G6h-6i    03:57:00  03:51:00
100.G*7b?    03:57:00  03:51:00

This is overly cautious. Without the gold, the white attack is not so strong and with
two rooks, black has a lot of firepower.

101.P*5g     03:58:00  03:51:00
102.+P4gx5g  03:58:00  03:52:00
103.B3ex5g   03:58:00  03:52:00
104.N3c-4e   03:58:00  03:52:00
105.B5g-4f   03:58:00  03:52:00
106.B*5g     03:58:00  03:52:00
107.S*7i     03:58:00  03:52:00
108.P*5h     03:58:00  03:52:00
109.R*3b?    03:59:00  03:52:00
The first move in byoyomi by Sato and a serious mistake. We will see why in a short
while. The rook drop in itself is not a bad move, but the square is wrong. If Sato
would have dropped the rook on 2b, it seems that black has a decisive advantage.

110.G*5i!    03:59:00  03:54:00

Dropping a gold on 5i is rarely seen and almost always bad, but Kubo might make this
his signature move. After winning the 6th game of the Osho with a gold drop on 5i, here
it is again.

111.G6i-6h   03:59:00  03:54:00
112.N5fx6h+  03:59:00  03:55:00
113.S7ix6h   03:59:00  03:55:00
114.B5gx4f+  03:59:00  03:55:00
115.S5ex4f   03:59:00  03:55:00
116.P*3a     03:59:00  03:55:00

This is why the rook drop on 3b is wrong. Sat said after the game that as soon as he
played 109.R*3b, he realized that P*3a would be a big problem.

117.R3b-2b+  03:59:00  03:55:00

The only way to keep the attack of the two rooks focused.

118.G*3b     03:59:00  03:55:00

Now black has to give up one of the two rooks and the black position is very vulnerable
to rook drops.

119.+R2bx3b  03:59:00  03:55:00
120.P3ax3b   03:59:00  03:55:00
121.G*7i     03:59:00  03:55:00
122.R*4i     03:59:00  03:57:00
123.B*5e     03:59:00  03:57:00
124.G5i-6i   03:59:00  03:57:00
125.G7ix6i   03:59:00  03:57:00
126.B*8i     03:59:00  03:57:00
127.K7hx8i   03:59:00  03:57:00
128.R4ix6i+  03:59:00  03:57:00
129.G*7i     03:59:00  03:57:00
130.G*7h     03:59:00  03:57:00
131.K8i-9h   03:59:00  03:57:00
132.G7hx7i   03:59:00  03:57:00
133.S6hx7i   03:59:00  03:57:00
134.+R6ix7i  03:59:00  03:57:00
135.G*8i     03:59:00  03:57:00
136.+R7i-6h? 03:59:00  03:58:00

Here Sato thought he had lost the game because of 136.S*9g. Kubo didn't like this
because of 137.Kx9g +Rx8i S*9h and he thought that black could fight back. However,
after +Rx9i N8e (attacking the rook, so Kubo thought this could not be played) P*7g!
white has a decisive advantage. For example, N*7d L*7c Nx8b G7ax8b wins for white.

137.K9h-9g   03:59:00  03:58:00
138.+R6h-5i? 03:59:00  03:58:00

Sato was already very relieved that Kubo had let him off the hook with 136.+R7i-6h,
but here he must have pinched himself.

139.B*2f!    03:59:00  03:58:00

Now white has to give up the rook that was gifted to him earlier on because 139.+Rx8i
fails to 140.+Bx7a and Gx7a Bx8b+ leads to mate.

140.P*7c     03:59:00  03:59:00
141.B2fx5i   03:59:00  03:59:00
142.P5hx5i+  03:59:00  03:59:00
143.R*4a     03:59:00  03:59:00
144.P*5d     03:59:00  03:59:00
145.B5ex1a+  03:59:00  03:59:00
146.B*6h     03:59:00  03:59:00
147.L*8e     03:59:00  03:59:00
148.P9c-9d   03:59:00  03:59:00
149.S4fx4e   03:59:00  03:59:00
150.S*3c     03:59:00  03:59:00
151.+B1ax3c  03:59:00  03:59:00
152.P3bx3c   03:59:00  03:59:00
153.G8i-7h   03:59:00  03:59:00
154.B*7i     03:59:00  03:59:00
155.S*8h     03:59:00  03:59:00
156.B7ix8h+  03:59:00  03:59:00
157.K9gx8h   03:59:00  03:59:00
158.B6h-5g+  03:59:00  03:59:00
159.S7e-6f   03:59:00  03:59:00
160.+B5g-3e  03:59:00  03:59:00
161.N*7e     03:59:00  03:59:00
162.S*6i     03:59:00  03:59:00
163.P*4f     03:59:00  03:59:00
164.S6ix7h+  03:59:00  03:59:00
165.K8hx7h   03:59:00  03:59:00
166.+P5i-6i  03:59:00  03:59:00
And game over after 166.Kx6i +Bx4f P*5g, because +B4e fails to Lx8c+ and after either
Sx8c or Gx8c, black wins with Rx7a+ followed by Nx8c=. In the press room the analysis
was stopped and preparations were underway to welcome a new Kio title holder.

167.S4ex5d?? 03:59:00  03:59:00

A blunder that throws away the game and the match. Sato said after the game that he
never even looked at 167.Kx6i.

168.+B3ex4f  03:59:00  03:59:00
169.P*5g     03:59:00  03:59:00
170.+B4f-6d  03:59:00  03:59:00
171.S5d-5c=  03:59:00  03:59:00

The reason Sato played 167.Sx5d was that he thought that black could play 171.+Rx7a
here. However, if white takes the other rook with 172.+Bx4b then even thought it is
a close call, there is no mate after Nx8c=.

172.+B6dx5c  03:59:00  03:59:00
173.+R4bx5c  03:59:00  03:59:00
174.S*7i     03:59:00  03:59:00
175.N7g-6e   03:59:00  03:59:00
176.+P6i-6h  03:59:00  03:59:00
177.K7h-7g   03:59:00  03:59:00
178.G*7h     03:59:00  03:59:00
179.K7g-8f   03:59:00  03:59:00
180.P8c-8d   03:59:00  03:59:00

The decisive move at last. This pawn both attacks the vital lance on 8e and attacks
on the head of the black king.

181.N*8c     03:59:00  03:59:00
182.S8bx8c   03:59:00  03:59:00
183.N7ex8c=  03:59:00  03:59:00
184.G7bx8c   03:59:00  03:59:00
185.N6ex7c+  03:59:00  03:59:00
186.G8cx7c   03:59:00  03:59:00
187.S6f-6e   03:59:00  03:59:00
188.P8dx8e   03:59:00  03:59:00
189.K8f-7e   03:59:00  03:59:00
190.+P6hx6g  03:59:00  03:59:00
Resigns      03:59:00  03:59:00
The simple threat is G*8d, but there is no good defense, so Sato resigned here. A great
game that had everything that makes shogi such a great game. Sato will be very
disappointed that he let this one slip away. On the other hand, Kubo will be delighted
with being able to claw back from the abyss and keep his two major titles. This was the
last game of the 2009-2010 season, but it was so impressive that it was selected as the
best game of the season.