25th Asahi Open Match Game 4
[Black "Akutsu Chikara, Challenger"]
[White "Habu Yoshiharu, Asahi"]
[Event "25th Asahi Open, Game 4"]
[Date "May 14th 2007"]
1.P7g-7f 00:00:00 00:00:00
2.P8c-8d 00:00:00 00:00:00
3.P2g-2f 00:00:00 00:00:00
4.P8d-8e 00:00:00 00:02:00
5.B8h-7g 00:00:00 00:02:00
6.P3c-3d 00:00:00 00:02:00
7.S7i-8h 00:00:00 00:02:00
8.G4a-3b 00:00:00 00:03:00
9.G6i-7h 00:00:00 00:03:00
10.B2bx7g+ 00:00:00 00:04:00
11.S8hx7g 00:00:00 00:04:00
12.S3a-4b 00:00:00 00:04:00
13.S3i-3h 00:00:00 00:04:00
14.S7a-7b 00:00:00 00:05:00
15.P4g-4f 00:00:00 00:05:00
16.P6c-6d 00:00:00 00:06:00
17.S3h-4g 00:00:00 00:06:00
18.S7b-6c 00:00:00 00:07:00
19.K5i-6h 00:00:00 00:07:00
20.S6c-5d 00:00:00 00:08:00
21.P1g-1f 00:05:00 00:08:00
22.P1c-1d 00:05:00 00:09:00
23.P9g-9f 00:06:00 00:09:00
24.P9c-9d 00:06:00 00:10:00
25.P3g-3f 00:15:00 00:10:00
26.G6a-5b 00:15:00 00:11:00
27.N2i-3g 00:16:00 00:11:00
28.P4c-4d 00:16:00 00:16:00
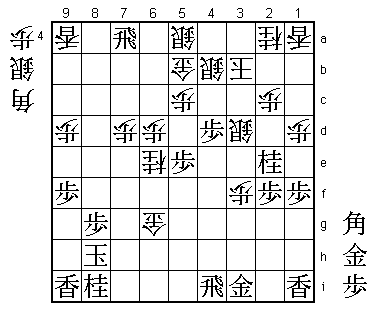
29.R2h-5h?! 00:33:00 00:16:00
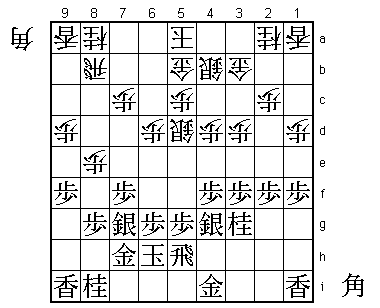
Just as everyone was expecting a classic Kakugawari Reclining Silver opening,
Akutsu pulls a rabbit out of his hat. This is a new move in this position.
The idea behind this move is to push the center pawn up and create a high
position where white has no space to move. If white doesn't do anything to
prevent this, it is easy for black to get a strategically won position after
which white can only wait for the black attack. Despite being 2-1 down in this
best-of-five match, this positive way of playing shows that he is far from ready
to throw the towel in this match. Of course, this strategy is not only positive,
but also risky. If white pulls back the silver to 4c, he will have a four general
castle that is hard to break down. Also, if black pushes up the board, it will be
very difficult to cover all the holes for a potential bishop drop. Calculating all
the possible drops is going to be a constant strain. Although in this position the
move 29.R5h is new, a similar idea has been played with white two times before.
In a game between Aono and Shima in 2003, Aono managed to find a good way to drop
the bishop and easily won the game. Sato Yasumitsu had more success, beating
Maruyama with white in 2002. However, the way Akutsu plays in this game is very
different from these two games, so even though the moves are similar, there is no
real connection.
30.K5a-4a 00:33:00 00:19:00
31.P5g-5f 00:37:00 00:19:00
32.P7c-7d 00:37:00 00:20:00
33.P5f-5e 00:37:00 00:20:00
34.S5d-4c 00:37:00 00:20:00
35.K6h-7i 00:46:00 00:20:00
36.K4a-3a 00:46:00 00:23:00
37.R5h-5i 00:46:00 00:23:00
38.N8a-7c 00:46:00 00:27:00
39.S4g-5f 00:51:00 00:27:00
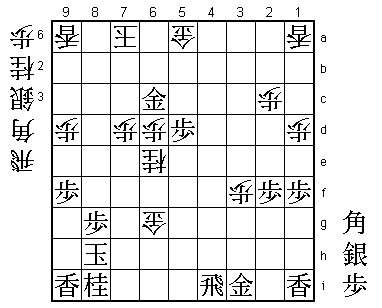
40.N7c-6e! 00:51:00 00:51:00
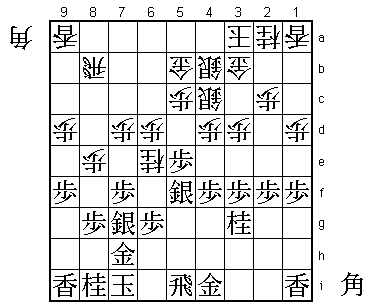
Habu attacks before Akutsu has a chance to build an ideal position. The white castle
is very strong, so this is the right time to start the hostilities.

41.S7g-6h    01:18:00  00:51:00

Akutsu thought that it was possible to survive the white attack, as there are not
many attacking pieces. However, the difference between the two kings is too big and
white already has the advantage here. After the game Akutsu admitted that his new
opening idea had been a dud.

42.P8e-8f    01:18:00  00:51:00
43.P8gx8f    01:18:00  00:51:00
44.R8bx8f    01:18:00  00:51:00
45.P*8g      01:18:00  00:51:00
46.R8fx7f    01:18:00  00:51:00

The problem. White sacrifices the rook for a general, but can afford to do so with
the four general castle.

47.P6g-6f    01:18:00  00:51:00
48.R7fx6f    01:18:00  00:59:00
49.G7h-6g    01:20:00  00:59:00
50.B*7e      01:20:00  01:32:00
51.B*3i      01:25:00  01:32:00
52.R6fx6g+   01:25:00  01:34:00
53.S5fx6g    01:25:00  01:34:00
54.B7ex3i+   01:25:00  01:34:00
55.G4ix3i    01:25:00  01:34:00
56.B*4g      01:25:00  01:34:00
57.B*2g!     01:58:00  01:34:00
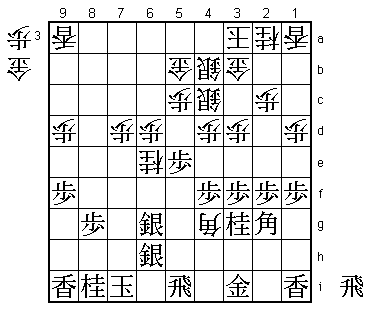
Akutsu shows that he has not become challenger for nothing. This seems to be just
defending the bishop promotion on 3f and the black bishop also doesn't seem to have
much hope of being activated, but dropping it here is the best move, making things
complicated for white.
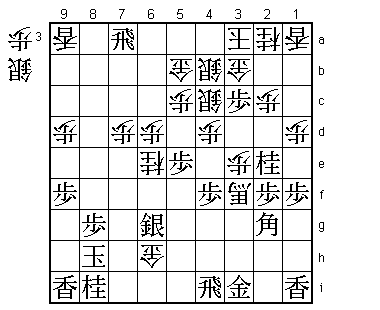
58.P3d-3e? 01:58:00 01:44:00
Habu regretted this move, as it makes the position much closer than he would have
liked. The right move was to make the king safe with 58.K2b, because black has no
good moves. Handing over the initiative in a position in which there is no good move
is a tactic that professionals often use and it would have been particularly effective
here.
59.N3g-2e 02:03:00 01:44:00
This starts a counterattack that makes this game quite interesting again.
60.P*8h 02:03:00 02:03:00
61.K7ix8h 02:04:00 02:03:00
62.G*6i 02:04:00 02:03:00
63.R5i-4i 02:04:00 02:03:00
64.B4gx3f+ 02:04:00 02:03:00
65.P*3c 02:15:00 02:03:00
66.G6ix6h 02:15:00 02:19:00
67.R*7a 02:17:00 02:19:00
The board is on fire here. The bishop on 2g, the silver on 6g and the gold on 3b can
all be captured. It is very easy to panic in this kind of position.

68.S*5a?     02:17:00  02:27:00

Another mistake by Habu, who is very fortunate that even two mistakes do not change
the outcome of the game. Correct was 68.G5a. For example, 69.Bx3f Gx6g Px3b+ Kx3b B6c+
S*7f is winning. The simple mating threat is N7g+ and after R7i S*7g K9g P*8f Px8f S7h=
black has no defense. Habu didn't play G5a because he felt that at some point B*8d
would be to strong. However, in the variation above, black never has the opportunity
to drop the bishop.

69.P3cx3b+   02:19:00  02:27:00
70.K3ax3b    02:19:00  02:27:00
71.B2gx3f    02:29:00  02:27:00
72.P3ex3f    02:29:00  02:27:00
73.P4f-4e    02:32:00  02:27:00
74.G6hx6g?!  02:32:00  02:30:00

This surprised Akutsu very much. He thought that he was still losing after 68.S*5a,
but that white could not afford to ignore 73.P4e. After the game it was shown that
white is also winning after 74.Px4e with an easier path than in the game. Habu didn't
think long about 74.Px4e, because it would not put any pressure on black and therefore
black would just continue to attack. Habu felt that after 74.Gx6g the position was close,
but couldn't find the black win, so he trusted his amazing endgame sense here without
being able to calculate everything until the end. On the other hand, Akutsu suddenly had
the feeling that he could still win this game...

75.P4ex4d    02:32:00  02:30:00
76.S4c-3d    02:32:00  02:30:00
77.P*3c      02:57:00  02:30:00

Akutsu took 15 minutes of his remaining 18 minutes to find a win in this position. He was
convinced that there was a win here, and was very frustrated that he couldn't find it in
time. He must have had mixed feelings when after the game it became clear that there was
no win for black in this position. Relieved that his calculation was correct, disappointed
that even two and a half mistakes by Habu were not enough to turn the tables.

78.N2ax3c    02:57:00  02:34:00
79.R7ax5a+   02:57:00  02:34:00
80.G5bx5a    02:57:00  02:35:00
81.S*4c      02:57:00  02:35:00
82.S4bx4c    02:57:00  02:36:00
83.P4dx4c+   02:57:00  02:36:00
84.S3dx4c    02:57:00  02:36:00
85.N2ex3c+   02:57:00  02:36:00
86.K3bx3c    02:57:00  02:36:00
87.N*4e      02:57:00  02:36:00
88.K3c-4b    02:57:00  02:37:00
89.N4ex5c+   02:57:00  02:37:00
90.K4bx5c    02:57:00  02:37:00
91.S*5d      02:57:00  02:37:00
92.S4cx5d    02:57:00  02:40:00
93.P5ex5d    02:57:00  02:40:00
94.K5c-6b    02:57:00  02:41:00
95.G*6c      02:59:00  02:41:00
96.K6b-7a    02:59:00  02:41:00
Resigns      02:59:00  02:41:00
No mate after 97.S*7b K8b B*7c K9c and there are many mating threats against the black
king like R*7h or N*7f, which cannot be defended at the same time. This ends the first
appearance by Akutsu at the big stage. Being denied by Habu was perhaps inevitable at
this stage of his career, but Akutsu showed great potential, particularly in the third
game. It seems likely that we will see him again in a title match in the near future.