20th Asahi Open Match Game 2
Black: Horiguchi Kazushiza, 5-dan
White: Sugimoto Masataka, 6-dan
20th Asahi Open, Game 2, April 4th 2002
1.P7g-7f 00:02:00 00:00:00
2.P3c-3d 00:02:00 00:00:00
3.P2g-2f 00:04:00 00:00:00
4.P4c-4d 00:04:00 00:01:00
5.S3i-4h 00:04:00 00:01:00
6.S3a-3b 00:04:00 00:01:00
7.P5g-5f 00:04:00 00:01:00
8.R8b-4b 00:04:00 00:01:00
9.K5i-6h 00:04:00 00:01:00
10.K5a-6b 00:04:00 00:01:00
11.K6h-7h 00:04:00 00:01:00
12.K6b-7b 00:04:00 00:01:00
13.B8h-7g 00:07:00 00:01:00
14.S3b-4c 00:07:00 00:01:00
15.S4h-5g 00:11:00 00:01:00
16.K7b-8b 00:11:00 00:01:00
17.K7h-8h 00:12:00 00:01:00
18.S4c-5d 00:12:00 00:02:00
19.P6g-6f 00:13:00 00:02:00
20.L9a-9b 00:13:00 00:02:00
21.P2f-2e 00:13:00 00:02:00
22.B2b-3c 00:13:00 00:02:00
23.G4i-5h 00:16:00 00:02:00
24.K8b-9a 00:16:00 00:02:00
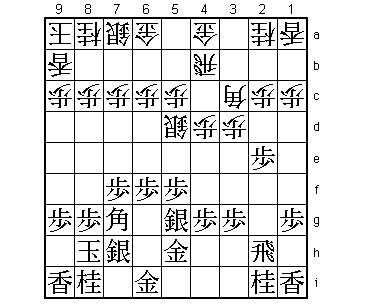
25.S7i-7h 00:17:00 00:02:00
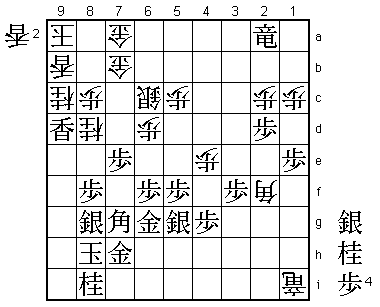
It's almost strange to see the ranging rook side build an anaguma.
In recent years, the big issue in Furibisha against Ibisha games has
been the Fujii system, which aimed at stopping the Ibisha side from
playing anaguma because of the threat of an early attack. In this
game it is not only white who plays the anaguma, black also doesn't
answer this with an anaguma of his own, but with the Left Mino.
26.S7a-8b 00:17:00 00:02:00
27.P8g-8f 00:17:00 00:02:00
28.G6a-7a 00:17:00 00:05:00
29.G5h-6g 00:19:00 00:05:00
30.G4a-5b 00:19:00 00:10:00
31.S7h-8g 00:19:00 00:10:00
32.P7c-7d 00:19:00 00:11:00
33.G6i-7h 00:19:00 00:11:00
34.G5b-6b 00:19:00 00:11:00
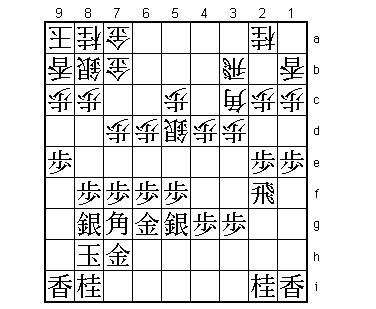
35.P9g-9f 00:20:00 00:11:00
36.L1a-1b 00:20:00 00:35:00
37.P1g-1f 00:28:00 00:35:00
38.R4b-3b 00:28:00 00:45:00
39.R2h-2f 00:30:00 00:45:00
40.P6c-6d 00:30:00 00:54:00
41.P9f-9e 00:31:00 00:54:00
42.G6b-7b 00:31:00 00:57:00
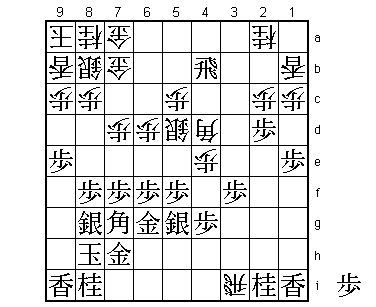
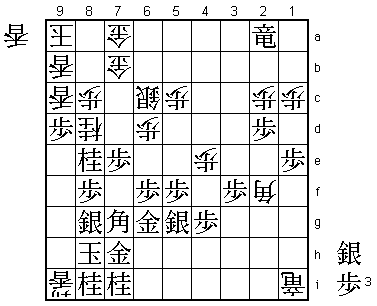
43.P1f-1e!? 00:48:00 00:57:00
Interesting waiting move. Most professionals would have preferred 43.P8e
followed by B8f here. Horiguchi is a player who can lure his opponent
into his dungeon. He beat Habu in the semi-final with the same strategy.
Force the opponent into action at an inconvenient moment and then
strike back hard. This is exactly what is happening here, even
though he is helped a little by a misjudgement by Sugimoto. By the way,
P1e is not a waiting move that is entirely without meaning. If white
plays a later B4d, it is possible to move the rook out of the bishop
diagonal to 1f.
44.P3d-3e 00:48:00 01:01:00
Sugimoto has no similar waiting move and therefore has to play
something positive.
45.S5g-4f 00:52:00 01:01:00
46.P4d-4e 00:52:00 01:11:00
47.S4f-5g 00:52:00 01:11:00
Horiguchi special number two. He has invited the pawn push to 4e and
now is waiting again for his opponent.
48.B3c-4d 00:52:00 01:20:00
Sugimoto bites and that proves costly. Exchanging rooks seems good
for him, but Horiguchi has judged this better. White should have
played 48.B5a instead and after 49.P6e Px6e P2d Px2d K9h P3f followed
by B7c white has good chances.
49.P2e-2d 01:22:00 01:20:00
50.P3e-3f 01:22:00 01:21:00
51.R2fx3f 01:24:00 01:21:00
52.R3bx3f 01:24:00 01:26:00
53.P3gx3f 01:24:00 01:26:00
54.R*3i 01:24:00 01:26:00
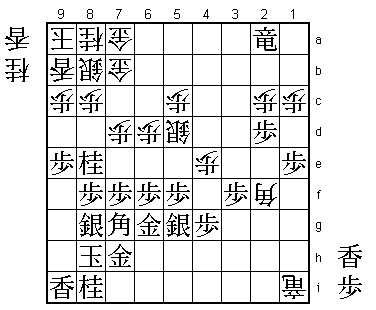
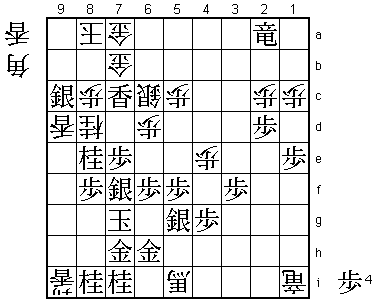
55.R*4b! 01:24:00 01:26:00
The right square. In the press room the slow attack 55.R*4a followed
by Px2c+ and +P3b was expected. Horiguchi has seen that if he picks up
the lance and knight on the right quickly enough, the attack against
the anaguma will be quite strong. On the other hand, even if white takes
the knight and lance on 2i and 1i, there is still no good place to use
them against the Silver Crown castle.

56.B4d-2f    01:24:00  01:27:00
57.R4bx1b+   01:24:00  01:27:00
58.R3ix2i+   01:24:00  01:27:00
59.+R1bx2a   01:24:00  01:27:00
60.+R2ix1i   01:24:00  01:47:00
61.N*8e!     01:28:00  01:47:00
Sometimes the bad order is the right order. The most natural built-up of
the attack is 61.L*9h and only then 63.N*8e. However, with white having
a lance in hand, Horiguchi didn't like 62.P8d in response to 61.L*9h.
Normally, pushing the pawn on 8c is not so good in the anaguma, but in
this case it stops black's attack.

62.N*8d?     01:28:00  02:04:00

Sugimoto didn't like 62.P8d Nx9c+ Sx9c L*9d S8b Lx9b+ Kx9b and tries to
get some attack of his own before it is too late. However, without the
worry of the knight being captured by P8d, black can play the natural
attack that would not have been possible earlier. Sugimoto should have
tried 62.P8d here.

63.L*9h      01:33:00  02:04:00
64.P7d-7e    01:33:00  02:08:00

The alternative 64.S6c Nx9c+ Sx9c P9d S8b P8e B5i+ S6h is also good for
black.

65.P7fx7e    01:35:00  02:08:00
66.S5d-6c    01:35:00  02:11:00
67.P9e-9d    02:02:00  02:11:00
68.P9cx9d    02:02:00  02:12:00
69.P*9c      02:02:00  02:12:00
70.S8bx9c    02:02:00  02:18:00
71.N8ex9c+   02:04:00  02:18:00
72.N8ax9c    02:04:00  02:22:00
73.L9hx9d    02:10:00  02:22:00
74.P*9g      02:10:00  02:27:00
75.L9ix9g    02:12:00  02:27:00
76.P*9f      02:12:00  02:28:00
77.L9gx9f    02:12:00  02:28:00
78.N8dx9f    02:12:00  02:29:00
79.S8gx9f    02:14:00  02:29:00
80.N*8d      02:14:00  02:30:00
81.S9f-8g!   02:25:00  02:30:00
Helping the attack with 81.S9e is tempting, but 81.S8g is the right
decision. After 81.S9e N9f K9h L*8h white suddenly has a strong attack.

82.L*9e      02:25:00  02:34:00
83.L9dx9c+   02:30:00  02:34:00
84.L9bx9c    02:30:00  02:34:00
85.N*8e      02:30:00  02:34:00
86.L*9b      02:30:00  02:52:00
87.P*9d      02:37:00  02:52:00
88.L9e-9i+   02:37:00  02:52:00
89.N*7i!     02:43:00  02:52:00
The game winner. 88.Kx9i Lx9d K8h L*9c and white is back in business.

90.L9cx9d    02:43:00  02:52:00
91.P*9c      02:43:00  02:52:00
92.P*7f      02:43:00  02:54:00
93.P9cx9b+   02:48:00  02:54:00
94.K9ax9b    02:48:00  02:54:00
95.S*9c      02:51:00  02:54:00
96.K9b-8a    02:51:00  02:54:00
97.L*7c      02:51:00  02:54:00
98.P7fx7g+   02:51:00  02:57:00
99.K8hx7g    02:51:00  02:57:00
100.P*7f     02:51:00  02:59:00
101.S8gx7f   02:52:00  02:59:00
102.B2f-5i+  02:52:00  02:59:00

When the game is already over, white finally manages to promote the
bishop.

103.G6g-6h   02:53:00  02:59:00
Resigns      02:53:00  02:59:00
White has no more attacking moves and is mated after 104.L*6a Lx7b+
Kx7b (Sx7b G*9b) G*7c K8a S8b+ Gx8b +Rx6a etc. A good win for Horiguchi
to tie the match which is now down to a best-of-three games. The next
game will be very important for both players.