13th Ryu-O Match Game 3
Black: Fujii Takeshi, Ryu-O
White: Habu Yoshiharu, 5K
13th Ryu-O sen, Game 3, November 15th and 16th 2000
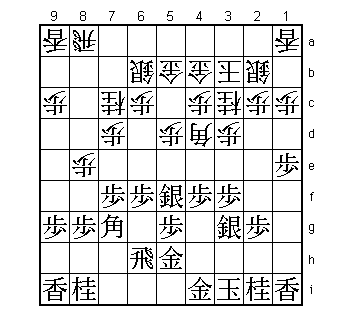
1.P7g-7f 1/1 0/0
2.P3c-3d 0/1 3/3
3.P6g-6f 2/3 0/3
4.S7a-6b 0/3 1/4
5.R2h-6h 2/5 0/4
6.K5a-4b 0/5 4/8
7.P1g-1f 5/10 0/8
8.K4b-3b 0/10 4/12
9.P1f-1e 6/16 0/12
10.G6a-5b 0/16 11/23
11.S3i-3h 11/27 0/23
12.P5c-5d 0/27 40/63
13.S7i-7h 12/39 0/63
14.P8c-8d 0/39 7/70
15.S7h-6g 8/47 0/70
16.P7c-7d 0/47 6/76
17.K5i-4h 5/52 0/76
18.P8d-8e 0/52 2/78
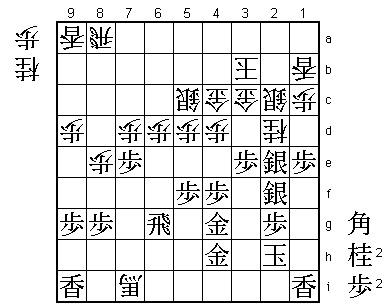
19.B8h-7g 0/52 0/78
20.B2b-4d 0/52 1/79
Again the ball is in Habu's court, as he has not found any holes
in Fujii's opening repertoire. 20.B4d gives Habu the option of
playing the "Millenium Castle" as he did in game 1 of the Oza match
against Fujii. However, he has something else up his sleeve.
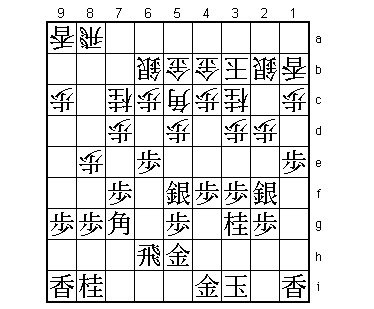
21.K4h-3i 85/137 0/79
22.N2a-3c 0/137 13/92
23.G6i-5h 7/144 0/92
24.S3a-2b 0/144 20/112
25.P4g-4f 7/151 0/112
26.G4a-4b 0/151 21/133
27.P3g-3f 28/179 0/133
28.N8a-7c 0/179 45/178
29.S6g-5f 3/182 0/178
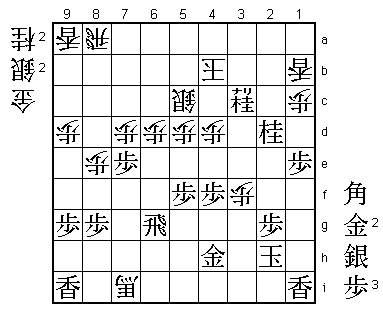
30.R8b-8a 0/182 27/205
Habu plays the "Subway Rook", planning a quick attack by L1b followed
by R1a and P1d. It is also played against normal Shikenbisha, but it
has been shown that the Furibisha side does not have much to fear
from this aggressive strategy. Habu's idea is that it might be more
effective now black has played the pawn to P1e as the Fujii system
subscribes.
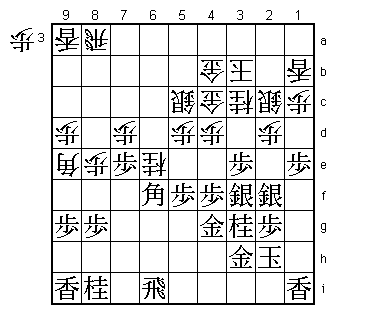
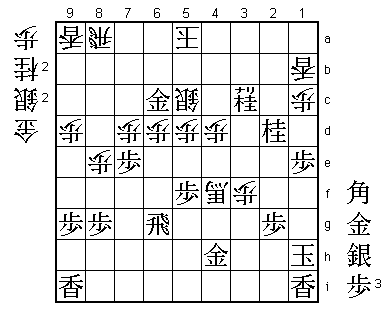
31.S3h-3g 20/202 0/205
If this would be Fujii's move, it would deserve an exclamation mark.
However, this has been played before and even though it weakens black's
castle formation, it is the perfect counter to the Subway Rook. Black
can strengthen the edge by playing S2f or, in case the Ibisha side
gives up his attacking plans, play the strong counter attack
P4e-S4f-G4g-R3h-P3e.

32.B4d-5c    0/202     58/263
33.P6f-6e    34/236    0/263
34.L1a-1b?!  0/236     29/292

Habu regretted this move. The edge attack will never materialise,
so this is just another weakness.

35.S3g-2f    75/311    0/292
36.P2c-2d    0/311     17/309
37.N2i-3g!   3/314     0/309
Further weakens black's castle, but it is more important to defend
against P2e and threaten the strong counter attack N4e.
38.P4c-4d 0/314 46/355
Habu takes 46 minutes to admit another strategic defeat. Now that
the bishop diagonal is closed, white no longer has any chances of
a strong attack. However, the threat N4e was too strong, so white
has no choice. From now on, the game develops in a much slower pace,
as both players rearrange their pieces. For Fujii this is much
easier than for Habu.
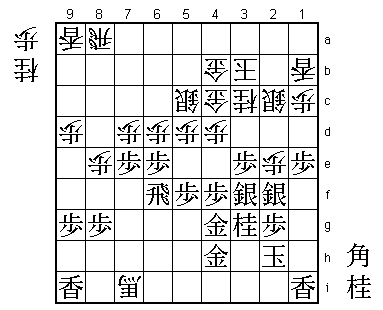
39.K3i-2h 29/343 0/355
40.G5b-4c 0/343 1/356
41.G4i-3h 1/344 0/356
42.P9c-9d 0/344 13/369
43.S5f-4g 13/357 0/369
44.R8a-8d 0/357 6/375
45.P3f-3e 30/387 0/375
46.S2b-2c 0/387 2/377
47.P3ex3d 10/397 0/377
48.S2cx3d 0/397 0/377
49.P*3e 0/397 0/377
50.S3d-2c 0/397 0/377
51.R6h-8h 1/398 0/377
52.R8d-8a 0/398 35/412
53.P5g-5f 14/412 0/412
54.P6c-6d 0/412 1/413
55.P6ex6d 1/413 0/413
56.B5cx6d 0/413 1/414
57.P*6e 1/414 0/414
58.B6d-5c 0/414 0/414
59.S4g-3f 2/416 0/414
60.N7cx6e 0/416 3/417
61.B7g-6f 0/416 0/417
62.B5c-6d 0/416 0/417
63.G5h-4g 2/418 0/417
64.S6b-5c 0/418 3/420
65.R8h-6h 6/424 0/420
66.B6d-7c 0/424 1/421
67.P7f-7e 2/426 0/421
68.B7c-9e 0/426 13/434
69.R6h-6i 0/426 0/434
70.P*6g?     0/426     1/435

Fujii underestimated the bishop move 68.B9e a little, and Habu had
a chance here to try and make a fight of it. If 70.R6a P9f P*6h
white has fighting chances after R2i B8d or R5i N7g+ Px9e Rx6f.
70.P*6g looks better than P*6h, but in this case it is worse.

71.R6ix6g    1/427     0/435
72.B9e-5i+   0/427     0/435
73.B6f-4h    1/428     0/435
74.+B5ix4h   0/428     0/435
75.G3hx4h    5/433     0/435
76.P*6d      0/433     0/435
77.P*6f      0/433     0/435
78.B*7h      0/433     2/437
79.R6g-6h    0/433     0/437
80.B7hx8i+   0/433     0/437
81.P6fx6e    0/433     0/437
82.+B8i-7i   0/433     1/438
83.R6h-6f    1/434     0/438
84.P2d-2e?   0/434     2/440
The wrong move order after which Fujii has no problems blowing up
the white position. Correct was 84.Px6e Rx6e P*6d and now black
has to move the rook back to 6f, as R5g fails to +B6h and R6f
is not good because of Px7e, threatening N*7d. The difference
with the game will become clear soon.

85.N3gx2e    11/445    0/440
86.N*2d      0/445     0/440
87.N2ex3c+   1/446     0/440
88.G4bx3c    0/446     1/441
89.S3f-2e    0/446     0/441
90.P6dx6e    0/446     4/445
91.R6fx6e    0/446     0/445
92.P*6d      0/446     0/445
93.R6e-6g!   0/446     0/445
This is why Habu should have played 84.Px6e instead. If he now
plays 94.Px7e as before, black can simply reply with 95.B*6c
and because the white king position is much weaker, black will
easily win the mating race. Having the rook on 6g is very significant.
Until the end, it will play a decisive role in attack and defence.

94.P*3d      0/446     2/447
95.P3ex3d    2/448     0/447
96.S2cx3d    0/448     0/447
97.N*3e      0/448     0/447
98.N*3f      0/448     0/447
99.S2ex3f    1/449     0/447
100.N2dx3f   0/449     0/447
101.G4gx3f   0/449     0/447
102.S3dx3e   0/449     0/447
103.S2fx3e   0/449     0/447
104.P*3d     0/449     0/447
105.N*2d     9/458     0/447
106.K3b-4b   0/458     0/447
107.N*2e     4/462     0/447
108.P3dx3e   0/462     1/448
109.N2ex3c+  0/462     0/448
110.G4cx3c   0/462     0/448
111.N*2e     9/471     0/448
112.P3ex3f   0/471     6/454
113.N2ex3c+  0/471     0/454
114.K4b-5a   0/471     0/454

One point of the rook on 6g is that 114.Kx3c S*3d Kx3d B*5b N*4c
P*3e Kx3e G*2e Kx2e Bx4c+ P*3d P2f leads to mate because the
rook can switch to 2g.

115.G*6c     6/477     0/454
116.+B7ix4f  0/477     0/454
117.K2h-1h   1/478     0/454
Resigns      0/478     0/454
Time:        07:58:00  07:34:00
Black can escape up the board along the first file, so white has no
mate. Another impressive victory for Fujii, who again won the opening
and this time was able to carry the lead over the finish line. For
Habu it is back to the study room to come up with something new again
for game four, a game he has to win as going 3-1 down would make things
very hard for him.